Showing posts with label dessert. Show all posts

Tuesday, December 21, 2010

Dairy- and Gluten-Free Eggnog "Cheesecake" Squares

In light of yesterday's post about the evils of flour and sugar -- the hilarity of which I hope wasn't lost on you -- today's post about Eggnog "Cheesecake" Squares is nothing if not ironic. Yes, folks, it's another dessert recipe. And it's probably the most processed thing I've ever made, thanks to the use of gluten-free graham crackers and dairy-free cream "cheese". (The latter tastes and smells so chemical, I nearly gagged. Thankfully this goes away upon baking.)

But 'tis the season for giving -- and indulging -- so this post is a holiday gift to some of my favorite bloggers-slash-readers who avoid gluten and/or dairy. Lindsay, Katie and Stew, this one's for you. (And your friends and family, who won't have a clue these treats are dairy- and gluten-free.) Enjoy!

Note: These squares aren't vegan because they rely on eggs -- particularly yolks -- as a binder, but I have faith Katie can veganize them. Or Angela, who could add some of her homemade Vegan Nog. Yum.)


Eggnog "Cheesecake" Squares (Dairy- and Gluten-Free)
Makes 16 to 24 squares, depending on cut size
Adapted from Elizabeth's Eggnog Cheesecake Bars at MarthaStewart.com*

8 ounces gluten-free graham style crackers (I used Kinnikinnick Foods S'moreables), crushed or processed into fine crumbs
4 tablespoons Earth Balance Buttery Spread, melted
3 tablespoons plus 3/4 cup sugar
1 lb (two 8-oz tubs) non-dairy cream cheese substitute (I used one tub of Tofutti Better Than Cream Cheese and one tub of Follow Your Heart Cream Cheese Alternative. I have no idea why.)
2 large whole eggs
1 large egg yolk
1 tablespoon brandy (optional)
1 tablespoon pure maple syrup
1 teaspoon pure vanilla extract or vanilla bean paste (I used paste)
1 tablespoon certified gluten-free oat flour*
1 teaspoon cornstarch*
1 teaspoon ground nutmeg
Pinch salt
Vegetable oil cooking spray

1. Heat oven to 350 degrees F and coat a 9-inch square cake pan* with cooking spray. In a medium bowl, combine the graham cracker crumbs, melted Earth Balance and 3 tablespoons sugar. Press into bottom of pan and bake for 12 minutes, rotating pan halfway through. Set on wire rack to cool.

2. Meanwhile, in the bowl of an electric mixer fitted with the paddle attachment (you could easily mix this by hand), beat the cream cheese substitute on medium speed with the eggs, egg yolk, brandy, maple syrup, vanilla, 3/4 cup sugar, oat flour, cornstarch, nutmeg and salt until thoroughly combined and smooth. Pour filling over crust.

3. Bake on middle oven rack until filling is set, rotating pan halfway through, about 40 to 45 minutes. (This took exactly 40 minutes for me, and the filling puffed up like a souffle. However it deflated and became perfectly flat and smooth as it cooled.) Cool on a wire rack for about an hour, then cover and chill for at least 3 hours or up to 1 day.

4. Cut into bars and serve.

*Notes:

- You may remember my November announcement that I wanted to recreate my mom's tofu cheesecake for Thanksgiving, and that it was a flop which went missing from my holiday table. Then I bought the Martha Stewart Holiday Cookies magazine, fell in love with the Eggnog Cheesecake Bars (which have made the rounds on some blogs), and thought maaaaaybe I could take a traditional cheesecake recipe and make it dairy- and gluten-free. Bingo! These babies are outstanding and taste exactly like traditional cheesecake.

- I wasn't mad about the idea of using a 9" square cake pan because I could foresee disaster when trying to cut and remove the squares from the pan. I was right -- I mangled about half the squares. So I would recommend using a springform or tart pan with removable sides.

- If you don't have or don't like oat flour, omit it and increase the cornstarch to 1 1/2 teaspoons.

- I bought Silk Nog with the intention of using it in place of the 3/4 cup of dairy eggnog in the Martha Stewart recipe, but when I poured it from the carton I realized it was too watery. I tried cooking it down to the thickness of traditional eggnog, but to no avail. So I ditched it. To compensate, I doubled the nutmeg and added 1 tablespoon maple syrup.

- The Martha Stewart recipe calls for baking the pan of cheesecake squares in a water bath, but I didn't think it was necessary. I was right.

P.S. I know, I know -- more wretched photos. It's still raining, which means no light or outdoor shoots. Hastily "styling" and photographing these babies before rushing out the door to work doesn't help either. Especially when a restless puppy is gnawing on my ankles.

Wednesday, December 08, 2010

About That Pumpkin Bread Pudding...


I've mentioned a time or a hundred that I made -- say it with me now -- Bobby Flay's Pumpkin Bread Pudding for Thanksgiving. (Twice, actually: once as directed, and again with the extra custard from Flour's Super Pumpkiny Pumpkin Pie.)

I've also told you a time or a hundred that you really ought to make it. Or at least the pumpkin bread, which is the. Best. Ever.

The end.


Kidding. Some simplifying tips:

  • All of the components -- pumpkin bread, custard and sauces -- can be made a day or two in advance, and the pudding assembled the day you serve it. 
  • Neither the Crème Anglaise nor the Spicy Caramel Apple Sauce are musts; the pudding is fantastic unadorned or topped with whipped or ice cream.
  • That said, the Spicy Caramel Apple Sauce is easy to prepare and imparts a distinctive zing. 
  • As with all recipes calling for pumpkin purée, make your own if you're able. It makes all the difference.
  • Heck, make this with sweet potato or butternut squash purée if you'd like. (Just be sure to strain the water from the butternut squash.)
  • Speaking of straining, make sure to strain the custard as directed. Even better, make a half recipe of the filling for Flour's Super Pumpkiny Pumpkin Pie -- which doesn't need to be cooked or strained -- and use it in place of the custard.

What are you waiting for? Make it already. Sheesh.

Sunday, December 05, 2010

Super Pumpkiny Pumpkin Pie


I've been making a version of Flour Bakery + Cafe owner Joanne Chang's  banana bread for years, and thought it fitting that I inaugurate the recent addition of her new cookbook, Flour: Spectacular Recipes from Boston's Flour Bakery + Cafe, to my library by making her Super Pumkiny Pumpkin Pie for Thanksgiving. I have a soft spot for pastry chefs such as Chang who use adjectives like "pumpkiny," and write their recipes with instructions to "unfurl" and "pleat," which sound a lot like "twirl in your pleated skirt."

True to its name, this pie is super pumpkiny -- the result of cooking the pumpkin down to a paste so that it withstands the shocking quantities of milk and cream in the recipe. (This pie is not for the faint of heart.) True to form, I took some minor liberties with it. I used homemade pumpkin purée (something I always go to the trouble to make because I prefer the taste so); cooked it down for 7 minutes instead of 40 to 45;  and added 1/4 cup pure maple syrup and 1 tablespoon brandy.

A word to the wise: although Chang states that the recipes for both the filling and the Pate Brisee II (see below) yield enough for one 9-inch pie, I found that both made enough for at least two pies. No worries. I happened to be simultaneously making Bobby Flay's Pumpkin Bread Pudding, so I substituted the extra pie filling for the custard in his recipe, and froze the extra dough. If you're not in the same predicament (and what a predicament it was), halve the recipe, make two pies or visit Food Network for a version that appears to yield a single pie.

Happy baking, and be sure to unfurl and pleat as instructed.

Laird thinks I should trademark this, um, interesting pie angle.

Super Pumpkiny Pumpkin Pie
Makes (ahem) one 9-inch pie.

Pate Brisee II (recipe follows)
One 16 ounce can pumpkin purée (I made my own.)
2/3 cup packed light brown sugar (I used dark brown, as it's all I had.)
1 teaspoon ground ginger
1 teaspoon ground cinnamon
1/2 teaspoon freshly ground nutmeg
Pinch of ground cloves
1/2 teaspoon kosher salt
1/2 cup plus 2 tablespoons sweetened condensed milk
2/3 cup evaporated milk
3 eggs
1 egg yolk
3/4 cup heavy cream
1/2 teaspoon vanilla extract

My additions:
1/4 cup pure maple syrup
1 tablespoon brandy

1. Remove the dough from the refrigerator. On a well-floured work surface, roll out the dough into a circle about 12 inches in diameter and 1/8 inch thick. Roll the dough circle around the pin and then unfurl it on top of a 9-inch aluminum pie pan or glass pie dish. Press the dough gently into the bottom and sides of the pan. Evenly pleat the overhanging dough with your fingers to create a decorative edge, or use scissors to trim the overhang, leaving a 1/4-inch lip (to allow for shrinkage in the oven). Refrigerate the pie shell for at least 30 minutes. (The pie shell can be tightly wrapped in plastic wrap and refrigerated for up to 1 day or frozen for up to 2 weeks. Bake directly from the refrigerator or freezer.)

2. Position a rack in the center of the oven, and heat the oven to 350 degrees F.

3. Line pie shell with parchment paper, fill with pie weights, and blind bake for 35 to 45 minutes, or until the entire shell is light brown all the way through.

4. Meanwhile, scrape the pumpkin purée into a medium saucepan and stir in the brown sugar. Place over medium-low heat and cook, stirring occasionally with a wooden spoon, for 40 to 45 minutes, or until the pumpkin has reduced to a somewhat thick paste and darkened. Remove from the heat and whisk in the ginger, cinnamon, nutmeg, cloves and salt. Then whisk in the sweetened condensed milk and evaporated milk.

5. In a large bowl, whisk together the eggs and egg yolk until blended. Slowly whisk in the cream and vanilla (and the maple syrup and brandy, if using), then gradually whisk in the pumpkin mixture and continue whisking until thoroughly mixed.

6. When the pie shell is ready, remove from the oven and leave the oven set at 350 degrees F. Remove the weights and parchment, and pour the pumpkin custard into the shell.

7. Bake for 55 to 60 minutes, or until the custard is just set. The edges of the custard will puff up a little and the center should still have a little wiggle in it. Let cool on a wire rack for at least 2 hours. Serve at room temperature or chilled. (I found this pie tasted best after being refrigerated for 24 hours.)

8. The pie can be stored in an airtight container in the refrigerator for up to 3 days.

Pâte Brisée II
Makes about 10 ounces dough, enough for (ahem) one 9-inch single-crust pie, 10-inch crostata or 9-inch quiche.

1 cup unbleached all-purpose flour
2 teaspoons sugar
1/2 teaspoon salt
1/2 cup plus 1 tablespoon (1 stick plus 1 tablespoon) cold unsalted butter, cut into 8 pieces
1 egg yolk
2 tablespoons cold milk

1. Using a stand mixer fitted with the paddle attachment (or a handheld mixer), mix together the flour, sugar and salt. Scatter the butter over the top and mix on low speed for about 45 seconds, or until the flour is no longer bright white and holds together when you clump it and pecan-size lumps of butter are visible throughout.

2. In a small bowl, whisk together the egg yolk and milk until blended. Add to the flour-butter mixture all at once. Mix on low speed for about 30 seconds, or until the dough barely comes together. It will look really shaggy and more like a mess than a dough.

3. Dump the dough out onto an unfloured work surface and gather it together into a tight mound. Using your palm and starting on one side of the mound, smear the dough bit by bit, starting at the top of the mound and then sliding your palm down the side and along the work surface (at Flour we call this "going down the mountain") until most of the butter chunks are smeared into the dough and the dough comes together. Do this once or twice on each part of the dough, moving through the mound until the whole mess has been smeared into a cohesive dough with streaks of butter.

4. Gather up the dough, wrap tightly in plastic wrap, and press down to flatten into a disk about 1 inch thick. Refrigerate for at least 4 hours before using. The dough will keep in the refrigerator for up to 4 days or in the freezer for up to 1 month.

Thursday, December 02, 2010

Mile High Apple Pie with Spicy Caramel Sauce


I eat apples year round -- they've been a favorite (and daily) snack since I was a child -- but I especially look forward to apple season each year. I'm smitten with fresh-from-the-orchard heirloom varieties brimming with crispy crunch and bright flavor. I'm particularly fond of Sierra Beauties, which I discovered in 1994 and, quite by accident, made into the best pie ever. (Sorry to toot my own horn, but...1994, guys! Sierra Beauties are that good.)

Sadly, this year apple season pretty much passed me by. But I am enjoying the last few late-harvest organic Arkansas Black apples from Whole Foods, and I did manage to turn a pile of humble Granny Smiths into a Mile High Apple Pie for Thanksgiving.


Spicy and comforting, this pie even has a sauce. I highly recommend you make it for your next gathering or random craving. I know it looks like a lot of steps, but I'm nothing if not overly-descriptive. Making it is a simple, satisfying endeavor.


Mile High Apple Pie with Spicy Caramel Sauce
Makes one 8- or 9-inch pie

Perfect dough for double-crust pie:
2/3 cup cold water
1 teaspoon kosher salt
3 cups unbleached all-purpose flour, measured with the scoop and sweep method
3/4 cup (1-1/2 sticks or 12 tablespoons) unsalted butter, very cold, cut into 1/2-inch cubes
1/2 cup (4 tablespoons) cream cheese, very cold, cut into 1-inch pieces
5 tablespoons vegetable shortening, very cold

Filling:
9 medium Granny Smith apples, peeled, cored and cut into eighths
Juice of 1 lemon
1 teaspoon pure vanilla extract (or 1 tablespoon vanilla bean paste)
1 tablespoon apple brandy or liquor of choice (optional)
3/4 cup brown sugar, tightly packed
1/4 cup unbleached all-purpose flour
1/2 teaspoon kosher salt
1 teaspoon cinnamon
1/4 teaspoon ground nutmeg
1/8 teaspoon ground allspice
Pinch ground cloves
1/4 cup heavy cream
4 tablespoons unsalted butter, cold, cut into 1/2-inch cubes
1 cup half and half
Granulated or sanding sugar

Egg wash:
1 large egg yolk
2 tablespoons water, milk, cream or half and half (don't say I don't give you choices)

1. Make the pie dough:
Dough can be made in a large bowl with a pastry cutter, in a stand mixer fitted with the paddle attachment, or in a food processor.
- Dissolve salt in water and keep it very cold. (I make the saltwater in a glass measuring cup and set it in the freezer.)
- Cut butter into flour just until large pea-sized lumps remain.
- Add cream cheese and vegetable shortening and gently stir, mix or pulse until the cheese and shortening are just incorporated. Big shaggy lumps should remain.
- Add water in a slow, steady stream -- all the while gently stirring, mixing or pulsing -- until dough just comes together.
- Transfer dough to a floured surface, knead gently a few times and cut in half. Shape into balls, flatten into discs about 1 inch thick, wrap in plastic and refrigerate for at least 2 hours.

2. Blind bake the bottom crust:
- Heat oven to 350 degrees F.
- Remove one pie dough disc from refrigerator and place it on a floured surface. Roll to a 10-inch circle and place it in an 8- or 9-inch pie dish with deep sides (at least 1-1/2 inches).
- Gently press dough into the corners and sides of dish and trim edges to no more than 1/4 inch from the top edge.  (Dough will shrink as it bakes.) Prick all over with a fork, line with parchment, fill with beans or pie weights, and "blind bake" for about 30 minutes or until evenly browned.
Note: I use the dough scraps to make decorative shapes for the top crust. Gather the scraps into a ball, wrap in plastic and refrigerate for at least 30 minutes.

3. Meanwhile, macerate the filling:
- In the biggest bowl you can find, toss the apples with lemon, vanilla, brandy, sugar, flour, salt and spices. Let sit at room temperature for about 30 minutes. 

4. Roll out the top crust:
- Remove the second dough disc (not the ball of scraps) from the refrigerator and roll out as instructed above, except this time make an 11-inch round.
- Cut a 1-1/2 inch circle (or other shape if you have small cookie or pie cutters) from the middle.

5. Make egg wash:
- In a small bowl, whisk the egg yolk with the water, milk, half and half or cream. 

6. Assemble pie:
- Add cream to the macerated apples, toss to combine, and transfer apples with half their juices to the bottom crust, piling high in the middle.
- Dot apples with the 4 tablespoons cold butter pieces.
- Center and lay top crust over apples, gently pressing it against them to avoid big air pockets.
- Use a pastry brush to apply egg wash to edges of bottom crust (I know this seems weird because the bottom crust is baked; work with me here), then press the top crust firmly against the bottom crust to form a seal. (The egg wash glues the crusts together.)
- Trim excess dough from around the edges and place pie in the refrigerator while you cut decorative shapes from the dough scraps.

7. Decorate and bake:
- On a floured surface, roll the ball(s) of scraps into a rectangle and cut decorative shapes such as leaves, apples or whatever strikes your fancy.
- Brush both sides of your decorative shapes with egg wash, remove pie from the refrigerator, and glue the pieces to the edges of the crust (they look quite pretty if they slightly overlap).
- Brush the surface of the top crust with egg wash, sprinkle with sugar and, if you have extra decorative pieces, glue them randomly or in a pattern on the surface of the crust.
- Prick crust with a fork if you like, for extra ventilation.
- Bake for about 45 minutes to an hour, or until the crust is nicely browned and the apples are soft and bubbling. (Tent with foil if the crust browns too quickly.)
- Remove from oven to cool and set. Serve warm, with ice cream and caramel sauce.

8. Make the caramel sauce:
- Bring reserved juices from macerating the apples to a simmer over medium-low heat.
- Cook, stirring constantly, until thickened, 1-2 minutes.
- Slowly stir in the half and half and cook for another minute or two. Serve warm, for drizzling over pie.

Tuesday, August 24, 2010

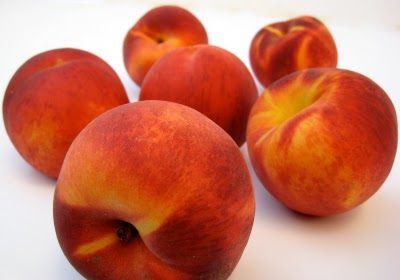
National Peach Pie Day and Individual Peach Crumbles


According to my Twitter feed, today is National Peach Pie Day. What I'm about to tell you might lead you to believe I'm a hater who harbors a weird childhood-trauma-induced grudge against peaches, pies and food "holidays." Au contraire. I adore all of these things (er...the peaches, pies and food holidays, not hate, grudges and childhood trauma), and used to work the peach and apricot harvests at a family farm during summer breaks from high school and college. (I practically lived on still-warm-from-the-summer-sun-and-so-juicy-I-needed-to-change-my-shirt-after-eating-them peaches. Bliss.)

But you should know (and you probably already do -- I'm not reporting the news here) that National Peach Pie Day is the invention of an industry advocacy group, most likely the National Peach Council, and is intended to increase peach production. You see, I used to be a PR flack who worked on campaigns for food industry clients hawking everything from frozen vegetables to those disgusting who-do-they-think-they're-fooling powdered egg substitutes used in food service.

True story: I once accompanied an actor dressed up as a giant slice of pizza on a statewide media tour to promote "Real California Cheese on Pizza Month." The annual assignment was given to every rookie account coordinator during his or her first year on the job, and was part of an ongoing marketing campaign so successful it's become the subject of a case study at Columbia University's Graduate School of Business. We'd get the Governor of California to officially declare October "Real California Cheese on Pizza Month," hire said actor to don said pizza costume and become "Cheesy," the "official spokes slice" for Real California Cheese, and travel around the state delivering pizza and talking points to morning radio DJs in major media markets. Oh the glamour.

While I loved working with recipe developers, food stylists and photographers on news bureaus and such, I was conflicted about my work with commodity food associations funded mostly by factory farms (and their federally-subsidized surpluses). Not that trade advocacy groups are so wrong in theory, but in practice they're much more interested in winning ADDY Awards than, say, bettering the lives of farm workers and animals.

So I "celebrate" National Peach Pie Day with a hefty dose of skepticism. (Although according to my limited research, the National Peach Council is pretty grassroots and has a minuscule budget, which may explain why it's National Peach Pie Day and not Month.) But let's not throw out the baby with the bath water. Local farmers markets are teeming with late harvest varieties such as Sweet September and Autumn Flame, so pick up a dozen (preferably organic) peaches, make something simple like individual peach crumbles, and savor the last sweet bites of Summer.


Individual Peach Cobblers
Makes 4 to 8 servings depending on ramekin size

For the filling:
12 medium peaches, peeled* and cut into large chunks
1 tablespoon granulated sugar (or to taste)
1 tablespoon brown sugar (or to taste)
2 tablespoons unbleached all-purpose flour (wheat or gluten-free) OR 1 tablespoon corn or tapioca starch
1 teaspoon ground cinnamon (or to taste)
1/4 teaspoon ground ginger (or to taste)
1/4 teaspoon salt
1 teaspoon pure vanilla extract

For the crumble topping:
1/2 cup old fashioned oats
1/2 cup unbleached all-purpose flour (wheat or gluten-free)
1/2 cup chopped walnuts
1/4 cup brown sugar
1/2 teaspoon ground cinnamon
1/4 teaspoon salt
1/4 cup (1/2 stick) unsalted butter or vegetable substitute, very cold, cut into 1/2 inch pieces

1. Heat oven to 350 degrees F. Arrange oven-safe ramekins on baking sheet and set aside.

2. In a large bowl, combine the peaches, sugars, flour or starch, cinnamon, ginger, salt and vanilla. (Depending on the sweetness of your fruit, you may need more or less sugar.)

3. In a medium bowl, combine the oats, flour, walnuts, sugar, cinnamon and salt. Rub the butter into the mixture with your fingers until it resembles a coarse meal.

4. Spoon peach mixture evenly among the ramekins, filling each about 2/3 full. Top with the oat mixture and bake on center oven rack for about 30 minutes or until the filling is bubbling. Allow to cool slightly and serve with ice cream, yogurt, whipped cream or creme fraiche.

*Most recipes will instruct you to dip peaches in boiling water to loosen the skins. I find this to be unnecessary (and messy) with ripe peaches, which I peel with a paring knife or vegetable peeler.

Note: Peach crumbles are my husband's favorite dessert and I always have some on hand in the freezer. They keep, wrapped tightly in plastic wrap and/or aluminum foil, in the freezer for a month or two. Reheat in oven at 350 degrees F for 30 to 40 minutes (or until filling is bubbling) or in the microwave for 2 to 4 minutes.

Wednesday, July 14, 2010

Summer Cherry Pie

As evidenced by my recent posts, I went on a baking bender this weekend. I blame it mostly on the weather, which was cold, dreary and drizzly. When it's gloomy out, nothing makes me feel more cozy than a good session with my KitchenAid, especially when Tour de France and World Cup are on TV. I also happened to have three pounds of gorgeous organic cherries from the Farmers Market, and some new toys: a cherry pitter and a heart-shaped pocket pie mold that I got on sale for $4.99.

The cherry pitter is brilliant. It's one of those gadgets that seems unnecessary and indulgent until you have one, and then you wonder how you lived without it for so long. It helped me to turn a colander of cherries into pie filling in minutes.


The pocket pie mold, however, was a bust. (I returned it to the store yesterday.) It's a cutter/mold combo: it cuts heart shapes out of your crust, which you place in the mold, fill, and crimp shut. Williams-Sonoma makes it look easy breezy beautiful.


Problem is, the crust hearts should be at least 1/2-inch larger than the mold, which is concave. So when you add the fillilng, the crusts sink into the mold and don't crimp together. Sure, I could have cut larger hearts using the mold as a guide, but doesn't that defeat the purpose of the gadget? And the pie-crust-to-filling ratio was completely off. I could barely fit two tablespoons of filling into each pie, and a cherry would inevitably pop through the little heart cutout like an angry, bloodied olive.


So I did the only reasonable thing: I ditched the useless gadget and baked a full-size pie. Below is the recipe for the filling, adapted from here and there, but mostly from Cook's Illustrated's The Perfect Recipe


Summer Cherry Pie
Makes one 9-inch double-crust pie


3 pounds (about 6 cups) fresh cherries, stemmed, pitted and halved
3/4 cup sugar
1/4 teaspoon salt
4 tablespoons tapioca starch (also known as tapioca flour)
1 1/2 teaspoons ground cinnamon
1/8 teaspoon pure almond extract
1/2 teaspoon pure vanilla extract
zest of 1 lemon
juice of 1/2 lemon
Two 14-inch round pie crusts
1 large egg whisked with 1 tablespoon milk or water (optional)
Sugar for sanding (optional)


1. Preheat oven to 425 degrees F and position a rack in the middle. Line a pie plate with one of the crusts, fitting it to the corners and sides of the plate without stretching. (You will want a 1-inch overhang when trimmed.)

2. In a large bowl, combine the cherries, sugar, salt, starch, and flavorings, toss to combine thoroughly, and pour into the prepared pie plate.

3. Carefully top with the remaining pie crust, pressing the top and bottom crusts together. Using kitchen shears or a knife, trim the crusts to hang 1 inch beyond the rim of the pie plate. Tuck into the rim of the pie plate and crimp with a fork or your fingers to seal. Brush with the egg wash, sprinkle with sugar, and cut vents to allow the steam to escape. (You could get creative with the top crust, such as making a lattice or cutting shapes with mini-cookie cutters. I cut stars in mine, and glued them around the cutouts with the egg wash.)

4. Place the prepared pie in the freezer for 10 minutes (or in the refrigerator for 20 minutes) to firm up the crust. (This will ensure a flaky result.)

5. Remove the pie from the freezer or refrigerator, place on a baking sheet, and bake on the center rack of the oven at 425 degrees F for about 25 minutes, or until crust is lightly brown. Reduce heat to 400 degrees F and bake for another 20 to 30 minutes, or until the filling is bubbling and the crust is browned and cooked through. (Rotate the pie if it's browning unevenly, and tent with foil if it's over-browning at the edges.) Remove to a wire rack to cool. Serve warm or at room temperature.