Monday, December 19, 2011

German Chocolate Cake for Dad


When I was a child we had German chocolate cake for my dad's birthday every year. It was notable not only because it was his favorite, but because my mom purchased it from the supermarket's bakery instead of making it from scratch like she did other cakes. (Of course, cake was notable to begin with because ours was a macrobiotics-influenced natural foods household where sweets were reserved for special occasions. Even then, mom baked with honey, whole wheat flour and even tofu.)


Mom would arrive home from the store the evening before or the day of dad's birthday with the cake in a domed clear plastic carrier, tall and extravagantly decorated with rosettes around the edges and a red maraschino cherry on top. After dinner the cake would be plated and brought to the table; lights would be dimmed, candles lit and Happy Birthday sung. We'd sit around the table enjoying generous slices of cake with dad's favorite accompaniment, Dreyer's Grand French Vanilla ice cream, giggling and joking as the sugar made us increasingly giddy.

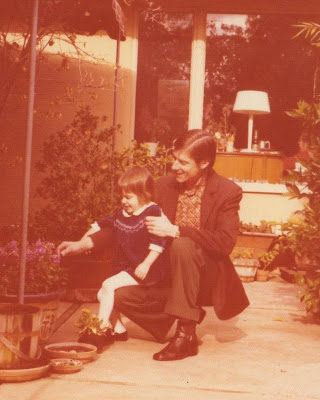
Over the weekend I made this cake in memory of my dad, who would have celebrated his 70th birthday had he received the liver and kidney transplant for which he was at the top of the waiting list in 2001. As I assembled the ingredients into a cake resembling those from his birthday celebrations years ago, I was reminded of how generous he was about sharing and celebrating food. I'll never forget how, in his last days, he offered his ICU nurse some of his ice chips "because they're so good." Those ice chips were all he was allowed to take by mouth (and were all the more precious because he was allotted only tiny amounts a few times per day) but he insisted on sharing the icy goodness. (That nurse has since become one of my dearest friends and I can't thank her enough for taking such good care of my dad.)


There's not a doubt in my mind that dad would have wanted you to have a slice of this German chocolate cake -- because it's so good. I hope you'll make and share it with someone you love.

And, as you make your New Year's resolutions, please consider designating yourself as an organ donor. Be sure to discuss and formalize your plans with your loved ones so that they're comfortable honoring your wishes. For more information, please visit the United Network for Organ Sharing (UNOS).

German Chocolate Cake
Makes one 9-inch four layer, or 6-inch six layer, cake.

I'd never made German chocolate cake and wanted it to be perfect, so I consulted several cookbooks and food blogs before settling on this recipe from David Lebovitz, who adapted it from his former Chez Panisse colleague Mary Jo Thoresen.

I made no changes to the cake layers or syrup, but increased the amounts of pecans and coconut in the filling. I also used my own recipe for chocolate icing, as I prefer a lighter chocolate buttercream over the dark chocolate ganache. The latter is a bit intense for the delicate rum-infused cake and nutty filling.

I can understand why my mom bought a German chocolate cake rather than make it from scratch, as this is a multi-step recipe that will take most of a day to make. But the result is well worth the time and effort.

For the cake:
2 ounces bittersweet or semisweet chocolate, chopped
2 ounces unsweetened chocolate, chopped
6 tablespoons water
8 ounces (2 sticks) unsalted butter, at room temperature
1 1/4 cup + 1/4 cup sugar
4 large eggs, separated
2 cups all-purpose flour
1 teaspoon baking powder
1 teaspoon baking soda
1/2 teaspoon kosher salt
1 cup buttermilk, at room temperature
1 teaspoon vanilla extract or vanilla bean paste

For the syrup:
1 cup water
2/4 cup sugar
2 tablespoons dark rum

For the filling:
1 cup heavy cream
1 cup sugar
3 large egg yolks
3 ounces butter, cut into small pieces
1/2 teaspoon kosher salt (omit if using pre-salted pecans)
1 1/2 cups pecans, toasted and chopped (note: I used store bought pecans that were roasted and salted)
2 cups shredded unsweetened coconut, toasted

For the icing:
4 ounces unsweetened chocolate, chopped
3 cups powdered (confectioners') sugar
4 ounces (1 stick) unsalted butter, softened but still cool and slightly firm to the touch
3 tablespoons milk, plus more if needed, at room temperature
1 teaspoon vanilla extract or vanilla bean paste
1/8 teaspoon fine grain salt

To make the cake layers:
1. Heat oven to 350° F. Grease two 9-inch or three 6-inch cake pans and line the bottoms with rounds of parchment or wax paper.

2. Melt both chocolates together with the 6 tablespoons of water. Use either a double-boiler or a microwave. Stir until smooth, then set aside until room temperature.

3. In the bowl of an electric mixer, or by hand, beat the butter and 1 1/4 cup of the sugar until light and fluffy, about 5 minutes. Beat in the melted chocolate, then the egg yolks one at a time.

4. Sift together the flour, baking powder, baking soda and salt.

5. Mix in half the dry ingredients into the creamed butter mixture, then the buttermilk and vanilla extract, then the rest of the dry ingredients. (Tip: I stir the vanilla into the buttermilk before adding it to the batter.) 

6. In a separate metal or glass bowl, beat the egg whites until the hold soft, droopy peaks. Beat int he 1/4 cup sugar until stiff.

7. Fold about one third of the egg whites into the cake batter to lighten it, then fold in the remaining egg whites until there's no trace of egg white visible.

8. Divide the batter into the prepared cake pans, smooth the tops, and bake for about 35 minutes for 6-inch cakes or 45 minutes for 9-inch cakes, until a toothpick inserted into the center comes out clean. Cool cake layers completely. 

While the cakes are baking and cooling, make the syrup, filling and icing.

To make the syrup:

1. In a small saucepan, heat the sugar and water until the sugar has melted. Remove from heat and stir in the dark rum.

To make the filling:

1. Put the 3 ounces butter, salt, toasted coconut and pecan pieces in a large bowl.

2. Combine the cream, sugar and egg yolks in a medium saucepan. Heat the mixture and cook, stirring constantly and scraping the bottom as you stir, until the mixture begins to thicken and coats a spoon (an instant-read thermometer will read 170° F).

3. Pour the hot custard immediately into the pecan-coconut mixture and stir until the butter is melted. Cool completely to room temperature (the mixture will thicken).

To make the icing:

1. In a small saucepan over very low heat (or a double boiler set over but not touching simmering water in the bottom pan), melt the chocolate, stirring constantly, until it's melted and smooth. Remove from heat and let cool to room temperature.

2. In the bowl of an electric mixer fitted with the paddle attachment, combine the powdered sugar, butter, 3 tablespoons milk, vanilla and salt. Beat on low speed until combined, about 1 minute. Stop the mixer and scrape down the sides of the bowl. Increase the speed to medium and beat for 2 minutes, then reduce the speed to low. Add the chocolate and beat until combined, then increase the speed to medium and beat for 1 minute more.

3. If the frosting is dry, add more milk, 1 teaspoon at a time, until it is creamy but still holds peaks. (Makes 2 generous cups.)

To assemble the cake:

1. Remove the cake layers from the pans and cut in half horizontally, using a serrated bread knife.

2. Set the first cake layer on a cake plate. Brush well with syrup. Spread 1/2 to 3/4 cup of the coconut filling over the cake layer, making sure to reach the edges. Set another cake layer on top.

3. Repeat, brushing each cake layer with syrup, then spreading coconut filling over each layer, including the top.

4. Ice the sides with the chocolate icing, then pipe a decorative border of chocolate icing around the top, encircling the coconut topping, and at the base of the cake if desired.

Wednesday, December 14, 2011

Winter Cake


This cake was almost an afterthought. The night before my husband's birthday in November, after dinner reservations had been confirmed and gifts wrapped, it occurred to me that I hadn't thought about a birthday cake.

I fretted for few moments -- everyone should have a special cake on their birthday, how could I have overlooked such an important detail -- before realizing that I had all of the ingredients for his favorite cake: vanilla sponge layered with berries and cream. Even better, the cake looks impressive but is a breeze to make and decorate (the latter is decidedly not one of my strengths).

I didn't even have to stay up much past my bedtime. But don't tell my husband. For all he knows, I labored for hours.


Winter Berries and Cream Cake
This cake seems like summer at first glance, but raspberry season extends through November. Take another look and the bright red berries against a blanket of snow white cream are the very picture of winter. Adorned with sprigs of seasonal greenery, this dessert would be a festive but light finale to a holiday meal.

The vanilla sponge is an adaptation of the vanilla cupcake recipe from The Magnolia Bakery Cookbook, which I lightened by separating the eggs, beating the whites and folding them into the batter at the end. I also added salt, an important but apparently overlooked ingredient. The whipped cream filling and frosting are old standbys in my kitchen.

For the cake:
1 cup (2 sticks) unsalted butter, softened but still cool to the touch
2 cups sugar
4 large eggs, separated (tip: separate the eggs when they're cold, then bring to room temperature)
1 1/2 cups self-rising flour
1 1/4 cups all purpose flour
1/2 teaspoon kosher salt
1 cup whole milk, room temperature
2 teaspoons vanilla extract or vanilla bean paste

For the frosting and filling:
2 cups heavy cream
2 teaspoons superfine sugar
1 teaspoon vanilla extract or vanilla bean paste
1 tablespoon seedless raspberry jam
1/2 to 1 pint fresh raspberries, rinsed and dried

Make the cake layers:
1. Heat oven to 350° F. Grease three 6-inch (or two 9-inch) cake pans, dust lightly with flour and line the bottoms with parchment rounds. Set aside.

2. In the bowl of a stand mixer fitted with the paddle attachment, cream the butter and sugar until light and fluffy, about 3 minutes. Add the egg yolks one at a time, beating well after each addition.

3. Meanwhile, whisk together the flours and salt. In a separate bowl or cup, stir the vanilla into the milk. Add the flour to the butter mixture in three parts, alternating with the milk, and beat until the batter just comes together. Set aside.

4. In a separate bowl that you are sure is clean and dry, beat the egg whites until stiff peaks form and no traces of runny white remain at the bottom of the bowl. Stir a third of the egg whites into the cake batter to lighten it, then gently fold in the remaining whites until no visible traces of whites remain.

5. Divide the batter among the prepared pans and bake on the middle oven rack for 20 to 25 minutes or until a cake tester or toothpick inserted into the middle comes out clean. Cool the cakes in their pans for 10 minutes, then remove from pans to cool completely on wire racks (be sure to remove the parchment from the cakes). The cakes can be wrapped tightly in plastic wrap and kept overnight before decorating and serving.

Make the filling and frosting:
1. Stir the cream and sugar together in a large mixing bowl and chill, with the whisk, for 30 minutes in the refrigerator or 10 minutes in the freezer.

2. Once the cream is chilled, add the vanilla, stir a few times and beat on increasing speed until soft peaks begin to form. It's important to under whip the cream because it will stiffen when you stir in the raspberry jam and decorate the cake.

3. Transfer about a third of the whipped cream to a medium bowl and stir in the jam until it's evenly distributed. Add more jam as desired to achieve a deeper color and stronger flavor.

Assemble the cake:
1. Set each cake on a flat surface, bottom side down, and use a long serrated knife to level the tops if they've domed or baked unevenly (my oven is not level, so everything I bake tips to one side). Cut each cake in half horizontally to make two layers. You'll end up with the six layer cake pictured above if you've used three 6-inch pans, or a four layer cake if you've used two 9-inch cake pans.

2. Place one cake layer in the middle of a serving plate or cake stand. Slide some parchment strips just under and all around the edges of the cake to keep the serving plate free of crumbs and extra frosting.

3. Spread enough filling to evenly cover the cake layer by a depth of about 1/4 to 1/2 inch. Repeat with the remaining cake layers, but don't top the final layer with the raspberry cream filling.

4. Using an offset spatula, spread the whipped cream over the sides and top of the cake. You should have enough for 1/2 to 3/4 inch of frosting. Use the spatula to make thick swoops in the cream if desired. Arrange raspberries around the top edge of the cake. (You'll use about 1/2 pint for a 3-inch layer cake, and closer to a pint for a 9-inch cake.) Gently remove the parchment paper strips from between the bottom layer and the plate, and serve.

Note: if desired, you could spread a very thin crumb layer of whipped cream over the cake and let it set in the refrigerator for 30 minutes to an hour before covering it with thick swoops of the remaining cream.

Monday, December 12, 2011

Gingerbread Ninjas


I spotted these adorable Ninjabread Men cookie cutters on A Cup of Jo this morning and want them, bad. (Never mind that they're part of a gift guide for toddlers.)

I usually bake gingerbread and sugar cookie men (and women and dogs and stars and such) to hang on my tree, a tradition that has gone by the wayside thanks to a little giant puppy who eats ornaments, edible or not.

Maybe I'll make a gingerbread ninja garland instead (to be hung very high on a wall, of course), or make a batch to bring to Stacey's Annual Latkes and Cookies Party. I'd love to try this gingerbread recipe from Gesine Bullock-Prado.

Friday, December 09, 2011

Holiday Gift Guide: Ten Stocking Stuffer Ideas

When I was a kid, in addition to whatever little toys and trinkets Santa placed in my stocking, on Christmas morning I'd always find a Tobler dark chocolate orange (now sold under the brand name Terry's), a Toblerone bar, mini candy canes, unshelled peanuts and an orange.

The orange would always work its way to the bottom of my stocking, and I'd dig it out to peel and eat while the whole family took turns opening presents. Then I'd get to work on my Toblerone bar, letting each triangle dissolve on my tongue until the chocolate was gone and the crunchy nougat bits remained. I continue this tradition today, because it's just not Christmas without these little pleasures.

Here are some more ideas for stuffing the stockings of people who like to cook, bake, eat and even talk about and photograph food.

These blue rimmed spoons are one of my favorite and most used kitchen tools.


 2. Zester, Grater or Peeler, $4 to $8
I love my citrus zester ($8) for removing fine ribbons of citrus peel for garnishing, cooking and baking. And do you see that brilliant practice of putting zest in ice cubes pictured below? Do it.


I firmly believe in world peace, being nice and grating my own nutmeg. The potency and flavor are unbeatable, and a few grates stirred into mashed potatoes is the bomb. This Microplane Premium Spice Grater ($10) does the job perfectly.


Kuhn Rikon Swiss Peelers are my favorite because they're only $4, fit in the palm of my hand and stay sharp for a very long time. They're also great for lefties and come in a variety of colors.


Long ago I lost track of how many times I've grated and cut my fingers. This cut resistant glove from Microplane is exactly what I need (hint, hint).


A cookie dough scoop is the secret to making uniform cookies. Every baker should have one.


5. Thermometers, $8 to $13
An oven thermometer ($8) is essential for ensuring you're baking at the right temperature. You'd be surprised  by how inaccurate oven temperature gauges can be. 


An InstaRead Meat and Poultry Thermometer ($10) is a must for anyone who prepares meat and poultry, because nobody likes Salmonella poisoning.


And a Candy and Deep Fry Thermometer ($13) comes in handy for tempering chocolate, making popcorn balls and frying up apple cider doughnuts.


6. Biscuit, Doughnut, Pie and Cookie Cutters, $1 to $15
I use my Biscuit and Doughnut Cutter set ($15) for the obvious, and also for cutting scones and venting pie crusts.


Speaking of pie, a set of mini cutters in festive shapes ($4 for 6) is just the thing for decorating pie crusts.


Not only are cookie cutters great stocking stuffers, they're also perfect for adorning wrapped presents and homemade gifts


I don't have words for how delicious these caramels are. Creamy with a bit of crunch, they're the perfect combination of salty and sweet. My in-laws are seriously addicted, and apparently I do in fact have words for how good these are.


 8. Bacon Jam, $14, or Blaak Onion Jam, $10 
This delicious caramelized onion and bacon spread from Skillet Street Food is fantastic on burgers, sandwiches (especially grilled cheese) and, well, everything.


For vegetarians, Blaak Onion Jam from Beekman 1802 is a perfect savory-sweet blend of onions, maple syrup and balsamic vinegar.


I hate/love these. I hate the term foodie but I love that these flashcards allow anyone to poke good natured fun at pretentious foodie terminology.


A fun stocking stuffer for food bloggers and anyone who snaps photos of their food.


 If you celebrate Christmas, what are your favorite stocking stuffers and traditions?

Thursday, December 08, 2011

Holiday Gift Guide: Ten Great Gifts for Cooks

Has anyone out there finished their holiday shopping? If you have, please don't tell me. The only thing I've purchased so far is a graffiti cocktail shaker for my office "bad Santa" gift exchange next week. (Shh.) So if you're still searching for the perfect gift for someone who likes to cook, look no further than the list below. You're sure to find something for novices and experts alike.

As with all products featured on Flour Child, I have not received compensation or consideration from manufacturers or retailers. These are all things I own and love.

I know, I know. $275 for a piece of cookware? Well, let me tell you, it's worth it. A few years ago a few of my friends got together and bought me this beauty in Caribbean Blue, and I'm completely smitten. It's large enough to accommodate a whole chicken, but not so unwieldy that I don't use it to make soups, stews and weekly vats of turkey bolognese. It really shines with dishes such as short ribs because it goes from stovetop to oven to table without missing a beat. (Note: Through December 11, Williams-Sonoma Cookware is offering 10% off orders of $100 or more, 20% off orders of $250 or more, 25% off orders of $500 or more and 30% off orders of $1,000 or more with code SAVENOW. )


2. Lodge Cast Iron Skillets, $11 to $34
Taking the price point way down without compromising quality or performance, let me tell you: no kitchen is complete without a seasoned cast iron skillet from Lodge. Two, actually: a 6 1/2 inch small skillet ($11) for eggs and small portions of meat and vegetables, and a 10 1/4 or 12 inch large skillet with assist handle ($23 and $34, respectively) for baking cornbread and frying up buttermilk brined chicken. These skillets go from stovetop to oven to campfire and are the perfect weight for making chicken under a brick skillet. Plus, they last for decades.

I use the round version of this griddle for everything from pancakes and crepes to seared tuna and skirt steak. It's definitely a kitchen essential.

This handsome olive wood salt keeper, with its swiveling magnetized lid, is just the thing for keeping Maldon sea salt within reach of your favorite cook, and can be monogrammed with one or three initials.


5. OXO Adjustable Potato Ricer, $30
I'm not into kitchen gadgets at all, but this is an exception. One of the best things I ever did was buy a potato ricer much like this one from OXO. It makes all the difference in mashed potatoes (think light and fluffy as opposed to gummy), and I should know -- I make mashed potatoes at least once a week. I love that it fits in a drawer and can be run through the dishwasher.


6. Cuisinart SmartStick Hand Blender, $30
Forget Vitamix, an immersion blender is all you need for pureeing soups, applesauce and baby food -- without having to transfer it from pot to blender. I've had mine for nearly 20 years and it's still going strong. Feeling spendy? Get the cordless version for $80.


7. Multipurpose Stainless Steel Kitchen Shears, $40, and Wusthof Poultry Shears, $60
No kitchen is complete without good kitchen shears -- I use mine for cutting everything from herbs to salmon skin to twine -- and this one works overtime as a nutcracker, bottle opener and screwdriver. And for those who cook chicken, I love Wusthof 's sharp, sturdy poultry shears.


 8. Trio of La Tourangelle Artisan Oils, $18
I'm a major fan of La Tourangelle oils, which are produced in central California in partnership with a respected French mill. I use the avocado oil instead of olive oil for cooking because of its 500° F smoke point, and the roasted walnut oil adds extra flavor to baked goods when substituted for canola or grapeseed oil (it's also fantastic for salad dressings). Visit La Tourangelle's website to select a trio of 250ml oils in a gift box and save 10%.


9. Pretty Potholders, $14
A while ago I picked up a set of two Rosetta Print Potholders, now marked down from $24 to $14, from Terrain. They're made from vintage upholstery fabric and are almost too pretty to use for anything but serving. Almost.


10. Cookbooks
If someone else hadn't already done it, I could write an entire blog about cookbooks. I'm a bona fide hoarder collector. Here are some of my favorites, old and new.

Super Natural Every Day (2011) by Heidi Swanson, $13.50
Heidi does it again. Beautiful photography and simple, satisfying recipes.


New Food Fast (2003) by Donna Hay, $16.50
I go nuts about everything Ms. Hay does. She is, hands down, the most brilliant food stylist ever.


Baked Explorations: Classic American Desserts Reinvented (2008) by Matt Lewis and Renato Poliafito, $17
I love the masculine styling and outrageous recipes. I made the Bourbon Chocolate Pecan Pie for Thanksgiving this year and people are still talking about it.


Saveur Cooks Authentic American (1998) by The Editors of Saveur Magazine, $30
I'm constantly reaching for this book for the stories, inspiration and Georgene's Fluffy Rolls.


Ottolenghi: The Cookbook (2010) by Yotam Ottolenghi, $23
I want to eat Ottolenghi's food every day.


Tartine (2006) by Elizabeth Prueitt and Chad Robertson, $23
This book never lets me down, and provides the best recipes for lemon desserts ever.


The Art of Simple Food (2007) by Alice Waters, $21
This cookbook is dear to my heart, as I had the privilege of accompanying Alice on the first leg of her book tour, which kicked off via private jet to the  Southern Foodways Alliance and Viking Range Corporation in Mississippi. Amazing and totally brag worthy.


The New Best Recipe (2004) by the Editors of Cook's Illustrated Magazine, $21
I have the 1999 edition of this book and am guessing the 2004 edition is even better.

Friday, December 02, 2011

Holiday Gift Guide: Top Ten Baking Essentials

Every baker has his or her favorite tools and equipment, and in this holiday gift guide installment I'm sharing mine. Some I've bought for myself, some I've received (very gratefully) as gifts, and every one I consider essential. Whether you're shopping for a baker or wondering what to put on your own wish list, these picks are sure to please.

Probably the best thing anyone can do to improve their baking is make a small investment in commercial-grade jelly roll pans from Chicago Metallic. Half sheet pans (aka "large," measuring 17 3/4"L x 12 3/4"W x 1"D) are perfect for baking anything and everything, are easy to clean, and last forever.


Tip: never, ever use dark (usually Teflon-coated "nonstick") baking sheets, and don't bother with the "air insulated" variety. The former causes uneven cooking (think overly browned undersides), and I don't find the latter to be effective for the money.

Silicone baking sheet liners are one of the best gifts I've ever received. They make any surface nonstick, have an insulating effect thanks to a fiberglass mesh interior, and make clean-up a breeze.


3. Cooling Rack, $16
An often overlooked essential for cooling and decorating baked goods and candies.


Precise measurements are fundamental to baking success, and weighing ingredients (especially flour, which varies greatly by type and brand) makes all the difference in the world. I love my Escali Arti scale because it measures liquid and dry ingredients, has a large display, is easy to clean, and can be stowed in a drawer when not in use. It's a great gift for bakers who have been meaning to buy a kitchen scale for a while but either haven't gotten around to it or can't decide which one to get (i.e., me, prior to last year).


5. Pastry Board, $44
Another gift I've received that I absolutely love. Made of sustainable North American birch, this board features standard and metric measurements for a variety of pie sizes.


I'm not great at rolling out dough with French rolling pins, but who wouldn't want to practice their skills with this gorgeous hand carved maple wood pin from Herriot Grace?


You can absolutely use beans or rice for blind baking pie shells, which I in fact did until I received these Williams Sonoma ceramic pie weights as a gift. They're great because they withstand high temperatures without burning or cracking (i.e., they don't have to be replaced after a few uses) and they come in a handy jar for storage.


I feel a bit sheepish recommending yet another Williams Sonoma product when retailers such as Chefs Catalog and Target offer the same or comparable items for less, but I haven't seen these clever spatulas elsewhere. I've had mine for more than five years and I love them because the removable head and stainless steel handle are easy to clean, dishwasher safe and virtually indestructible.


9. Flow Mixing Bowls, $19 to $29
These distinctive bowls from West Elm are sturdy, beautiful and suitable for prep as well as serving.


This is the end all be all gift for a baker. Several years ago I received a gently used black Artisan mixer from a beloved relative and I can't thank her enough. It's invaluable for mixing cookie and cake batter, cutting butter into flour for pastry, whipping cream and frostings, and kneading bread dough. With optional attachments it even grinds, juices and rolls pasta dough.


Tip: KitchenAid sells refurbished Artisan mixers in a wide range of colors for nearly 50% off.

P.S. As someone who collected comic books and often dressed up as Wonder Woman as a kid, I just adore the Wonder Woman mixer from KitchenAid Brasil.


Bonus picks: Self-scraping beater blades make awesome gifts for bakers who already have KitchenAid mixers. I use the BeaterBlade ($25 at Sur La Table), but I hear the KitchenAid Flex Edge Beater ($32 at Sur La Table) allows you to mix in chocolate chips and nuts without causing the mixer head to jump. I'm definitely putting the latter on my wish list.

BeaterBlade
KitchenAid Flex Edge