Monday, November 14, 2011

Happy Monday

I don't have a story to go with this post other than to say that I will probably never master the art of the perfect cappuccino, or find it worthwhile to make my own doughnuts again, and that I'm totally fine with it.


Happy Monday!

Thursday, November 10, 2011

Back on Pacific Standard Time

The upcoming long weekend is shaping up to be cold and rainy: ideal for heading to the Getty to check out an exhibit I've been wanting to see, Narrative Interventions in Photography. I'm particularly intrigued by Eileen Cowin's I See What You're Saying, which juxtaposes images of the written word against those of other sensory experiences -- the gaze of an eye, the taste of a cupcake -- to expose hidden lies behind presumed truths.

While I'm there, I plan to check out the Getty's contribution to the massive, multi-institution Pacific Standard Time exhibition about artistic innovation in post-World War II Los Angeles.


This is a tall order for a rainy Los Angeles weekend during which I'm slated for some home improvement projects, a trip to Disneyland and a first birthday party. Thank goodness we're back on Pacific Standard Time. I definitely appreciate the extra hour.

Wednesday, November 09, 2011

Can You Do This With Your Recycling?

Did you play singing games with your friends when you were a kid? I did, but I wasn't very good. Well, if you'd like to see how it's done, check out this video from the Swedish trio known as Erato. They took an overproduced dance anthem -- Robyn's "Call Your Girlfriend" -- and stripped it down to some of the most lovely, catchy harmonies I've ever heard.


Kinda makes you rethink those empty dairy containers in your recycling, doesn't it?

Tuesday, November 08, 2011

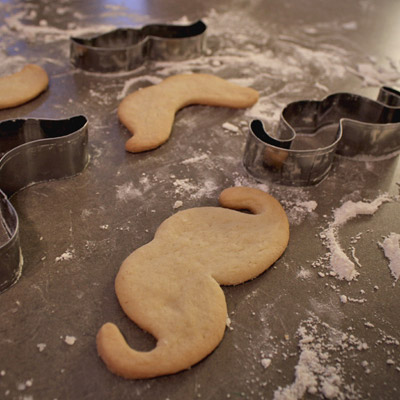
Mustache Cookie Cutters

A few guys I know are growing mustaches for Movember, and one of these mustachioed fellows (aka Mo Bros) recently shared a link to this awesome moustache cookie cutter set from Fuzzy Ink.


The sets are currently on backorder until (ironically) the end of November, but $5 from every sale goes to the Movember Foundation.

So if, like me, you can't grow a mustache but would like to support the cause, why not make a bunch of mustache cookies? They'd be the perfect treat for a Movember party to celebrate the Mo Bros in your life.


I just might make so many mustache cookies, we'll have to rename Movember, "Mowvember".

Monday, November 07, 2011

Made by Hand

Are you familiar with Made by Hand? It's a film series "celebrating the people who make things by hand -- sustainably, locally and with a love of their craft." As someone who grew up in a community of artisans who not only lived off the land but produced and sold exquisite handmade goods -- furniture, hammocks, looms, fly fishing flies, pottery -- the Made by Hand project is near and dear to my heart.

The second video in the Made by Hand series, below, showcases Joel Bukiewicz of Cut Brooklyn. A fiction writer turned knife maker, Joel articulates the satisfaction of creating an object that is not only loved and used by the person who buys it, but is of the caliber to become a family heirloom. I love what he says about the community of producing things by hand, the challenge of making each piece the best he's ever produced, and the drive to master his craft to the point of art.

I'm no Joel Bukiewicz, but I get what he's saying about the massive and immediate payoff of someone enjoying what he's made. It's what I miss most about my bakery business, and why I cook, bake and write and photograph this blog.

The music in this video is too creepy and severe -- something along the lines of "Cello Song" by The Books would have been a nice choice -- but the cinematography and story are spot on. Check it. [Note: there are many well-placed expletives in this video, so you've been warned.]


Made by Hand / No 2 The Knife Maker from Made by Hand on Vimeo.

Friday, November 04, 2011

The Apple Cider Doughnut Conspiracy


It was a conspiracy of sorts which led me to whip up a batch of apple cider doughnuts last weekend. (Whip up? Who am I kidding? My first attempt was horrific. The second time around, the doughnuts were good but not great. The third time? Stay tuned.)

I've been meaning to make doughnuts for quite some time, as they're one of the few sweets I have yet to try and replicate in my own kitchen. But frying up a bunch of sugary dough and drenching it in more sugar just hasn't been at (or near) the top of my list of priorities. I rarely eat commercially made doughnuts, so why would I tempt myself with a tray of homemade ones?

But lately, everyone at work has been going on and on about apple cider donuts; about how deliciously seasonal and fleeting they are. The doughnut shop version of the Starbucks Pumpkin Spice Latte, if you will. (Which, by the way, I tried once and won't bother ordering again. Sorry, PSL fans.)

And then last week, when I popped in to Sur La Table for something I can't even recall, I picked up a copy of Lara Ferroni's Doughnuts: Simple and Delicious Recipes to Make at Home. Wouldn't you know it, on the first page to which I flipped was a recipe for apple cider doughnuts. Conspiracy, I tell you.

So I bought the book -- and a deep fry thermometer and a baked doughnut pan -- and spent the better part of Friday night through Sunday afternoon trying to turn out perfect doughnuts. I experimented with baked and fried versions of apple cider, pumpkin and basic raised doughnuts, as well as various glazes and coatings. And yes, now that you mention it, I made some popcorn balls too.
I blew through a lot of flour, sugar and oil, and while very few of the doughnuts I made were satisfying or even edible, it felt good to be back in the kitchen making something special and new; something to try and style into a decent photograph. I have such a long way to go, and the process is sometimes so frustrating I want to give up, but I'm enjoying learning and growing. After all, isn't that what life is about? That, and the occasional doughnut conspiracy.


Apple Cider Doughnuts

1 3/4 cups all-purpose flour
1/4 cup graham flour (I subbed all-purpose flour)
2 teaspoons cinnamon
2 teaspoons baking powder
1 teaspoon baking soda
1/2 teaspoon salt
2 tablespoons unsalted butter or vegetable shortening, at room temperature
1/2 cup superfine sugar (I used regular granulated sugar and increased the amount by 2 tablespoons as instructed in Lara's book)
2 egg yolks, at room temperature
1 teaspoon vanilla extract
1/4 cup apple cider, at room temperature
1/4 cup buttermilk, at room temperature
Vegetable oil for frying

Special equipment: deep fry thermometer.

1. In a medium bowl, whisk together the flour(s), cinnamon, baking powder, baking soda, and salt. Set aside.

2. In the bowl of a stand mixer fitted with the paddle attachment, cream the butter and sugar together. Add the egg yolks and beat until the mixture is fluffy and pale yellow. Use a wooden spoon to stir in the vanilla, cider and buttermilk. Add the dry ingredients and stir just until the mixture comes together in a soft, slightly sticky dough. Cover and refrigerate for 15 to 20 minutes. (I refrigerated mine overnight.)

3. Roll out the dough on a lightly floured surface to about 1/2-inch thick. Cut the doughnuts out with a 2 1/2 inch diameter cutter. Re-roll any scrap dough. (Note: I wasn't happy with the flat shape when I fried and baked these, so I ended up rolling them into 1 1/2-inch balls.)

4. Heat at least 2 inches of oil in a heavy-bottomed pot until a deep fry thermometer registers 360 degrees F (182 degrees C). With a metal spatula, carefully place the doughnuts in the oil. Fry in small batches, taking care not to overcrowd the pot. Cook until a rich golden brown, about 1 minute on each side. (At 1 minute per side, my doughnuts were raw in the middle. At about 3 minutes per side, they cooked through.)

5. Remove with a slotted spoon and drain on paper towels. Let cool to the touch before glazing and eating. (I dredged mine in cinnamon sugar.) You can also bake these doughnuts in a doughnut pan in a 350°F oven for 5 to 10 minutes, but they won’t achieve the same rich golden color. (These were wretched when baked -- dry, flat, tasteless.)

Wednesday, November 02, 2011

Popcorn Balls

Halloween has come and gone and all I have to show for it is a sugar hangover, tons of leftover candy and a platter of popcorn balls.


Not that I'm complaining. Popcorn balls are my favorite treat of all time, and the story of how I became hooked on them reads like a hillbilly version of Hansel & Gretel, except nobody tried to stuff me in an oven.

When I was about 8 years old, I used to beg candy from a woman named Laverne who lived on the other side of the creek that separated our property from the only two neighbors within a 5 mile radius. Laverne was in her late 60s and wore her shoulder length white hair in an elaborate Veronica Lake 'do, an interesting contrast to the colorful polyester caftans she draped on her sturdy frame. She smelled of Aqua Net and kept jars of candy all over her house.


I'm not sure how I came to know about Laverne's candy stash, but I do know that my begging it from her was a short-lived but thrilling adventure punctuated by courage, danger and perseverance. (And humiliation and loss, which I will get to later.) 

To get to Laverne's house I had to not only cross an ice cold creek on a rickety footbridge (courage!), but trek a half mile up our road and across two clearings known to be frequented by rattlesnakes (danger!). If I wasn't felled by a venomous snake bite, I'd then climb a series of flagstone steps to Laverne's door; steps which may as well have been M.C. Escher's infinite stairs for how never ending they seemed to me at the time (perseverance!).

Quite a lot of effort for a piece or two of candy, but if your parents didn't keep sweets in the house you'd have done the same. And it paid. Oh, did it pay. 

When I arrived at her door, Laverne would kindly usher me into her home and, as my nostrils filled with the strong aroma of moth balls, I'd choose a few pieces of hard candy, saltwater taffy or a popcorn ball if she'd made a batch.

Those salty-crunchy-buttery-sticky-sweet popcorn balls were my undoing. Though my secret candy-begging missions started out as occasional after school excursions, I was soon knocking on Laverne's door every day and on weekends to try my chances at scoring another (and another) popcorn ball.

Laverne was friendly with my family and was therefore no doubt familiar with my parents' restrictions on sugar (and my reasons for begging it from her). And because she picked up her daily mail from the little vintage post office my mother operated for an hour in the mornings, Laverne had plenty of opportunities to tell my mom what was going on. But she didn't say anything for a few weeks, presumably because she found it harmless and cute and, let's be honest, pitiful. Until, that is, I became a demanding, sugar-addicted pest.

So Laverne talked to my parents and my parents talked to me and I felt humiliated and sad. I cried and pouted and lamented my sugarless, popcorn-ball-less fate. Then a few months later, when I'd all but given up hope, Laverne arrived at our Christmas party with a platter of popcorn balls. Bless her kind soul.

Popcorn Balls
Prep time: 10 minutes
Cook time: 15 minutes
Serves: 12

Special equipment: parchment or waxed paper, candy thermometer

About 4 quarts (16 cups) popped corn
2 cups granulated sugar
1 cup light corn syrup
1/2 cup unsalted butter or butter substitute
1/4 cup water
1/2  teaspoon salt (omit if using salted butter or butter substitute)
1 1/2 teaspoons pure vanilla extract or vanilla bean paste
1 teaspoon white vinegar
Butter or vegetable oil for greasing hands

1. Place the popped corn in a large bowl or pot, or arrange it on baking sheets lined with parchment or waxed paper. Set aside.

2. In a medium saucepan set over medium-high heat, combine the sugar, corn syrup, butter or butter substitute, water and salt. Cook, stirring constantly, until it reaches the firm ball (caramel) stage (240-240 degrees F or 112-116 degrees C). Remove from heat. Stir in the vanilla and then the vinegar. Be careful when adding the vinegar, as the mixture will bubble up quite a bit.

3.  Slowly (and as evenly as possible) pour the caramel over the popped corn, stirring with a wooden spoon to combine. Be careful, as the caramel will be very sticky and scorching hot. Continue stirring and mixing the popcorn mixture around until it's cool enough to handle, about 5 minutes.

4. With greased hands, shape the popcorn mixture into 3 inch round balls.

Note: For safety reasons, I don't recommend you let children make this recipe.


If you're serving popcorn balls at a party or giving them out as party favors or to trick-or-treaters, wrap them in cello or waxed paper bags tied with Brazilets or friendship bracelets. I used orange and black Brazilets (pictured above) for Halloween. Brazilets are wrapped around the wrist and tied with three knots. A wish is made for each knot and when the material wears down and the Brazilet falls off, it is believed that the wishes come true.


Edit:
Clearly I have a lot to learn about styling, composition, lighting and color correction. And I should make my photos the same size. And figure out how to put them side by side. Phew. Lots to do.

Monday, October 31, 2011

Happy Halloween!


I've mentioned a time or several that I wasn't permitted much in the way of sugar when I was a kid. This, combined with my family's tendency to go wild (in the best way) at every holiday, meant that on those occasions I was given free rein to indulge -- namely Halloween, Christmas and Easter -- I literally ate myself sick. I'll never forget the time I threw up all over my Shaun Cassidy glitter iron-on t-shirt and missed the rest of the day's festivities.

Clearly, I was flirting with danger whenever sugar came into play. And isn't that what Halloween is all about? Danger and sugar? During my peak trick-or-treat days, which coincided with the mass paranoia in the wake of the 1982 Tylenol poisonings, I was not unconcerned about razor blades in candy bars and cyanide powder in Pixie Stix. Of course, in those days my parents drove my brother, sister and me around the neighboring mountain communities -- in the dark of night -- to knock on strangers' doors and beg for candy. So my fears weren't completely unfounded, right?

Nowadays trick-or-treating seems to be a more hygienic activity that takes place in the light of day and among known entities. But what I love most about Halloween hasn't changed at all: pumpkin carving, adorable kids in costume, dogs in costume,  haunted hayrides... Everyone gets to be a kid and eat too much sugar and stay up too late.

Do schools still host Halloween carnivals? (I suppose they're called Harvest or Fall carnivals now?) I loved the carnival my middle school put on every year. My teachers dressed up as witches and zombies, the library was converted to a haunted house, and I tried my luck at bobbing for apples. But the best part was donning a costume my mom had spent hours making by hand especially for me.

I'm not dressing up this year, but the pumpkins are carved and the house is stocked with candy. I hope I get some trick-or-treaters, because otherwise I'm stuck with a bucket of candy. And we all know how that ends.

Monday, October 24, 2011

Spooky Fingers


This weekend, when I got a blood red manicure and ended up with a bloody gouge on my thumb (white whine), I was reminded of a Halloween project I've been meaning to undertake (ha ha) for far too long: spooky finger-shaped cookies.

This time of year, these clever Halloween treats are featured in every lifestyle magazine and all over the Web, so I'll spare you an essay on how frightfully fun and eerily easy they are to make. Though I will point out that this would be a fun project to do with kids. It's tactile, messy and has a delightful gross-out factor.

I used this technique but relied on my own recipes for sugar and molasses-ginger cookies, which was a mistake. After I painstakingly shaped the dough into fingers, they spread as they baked and ended up looking like tombstones. Which is fine if you're making tombstone cookies, but I wasn't. Happily, I salvaged the mess by using my hands to roll and shape the still-warm tombstones into fingers. I actually quite like the way they look wrinkled and decayed. But do yourself a favor and use Martha Stewart's (or a similar) recipe for a dough that will hold its spooky shape.

Happy almost Halloween!

Saturday, October 22, 2011

Vertical Garden

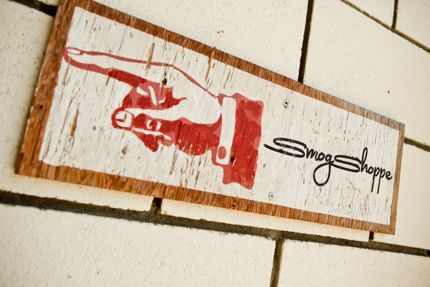
A couple of weeks ago I had the privilege of attending the most magical, sweet wedding at The Smog Shoppe. I'd heard about and seen photos of the venue -- a 25 year old automotive shop converted to a green event space -- but I wasn't prepared for how inspired it was up close.


Every inch of the 6,500 square foot indoor/outdoor space is decorated with an impeccably curated (ugh, I hate that word) collection of vintage and reclaimed furniture and objects, many of which pay tribute to the venue's origins. It's Anthropologie flagship store meets grease monkey.


I kind of want to live there (I'll keep the DJ booth but ditch the noise from the buses and traffic), and I definitely want to replicate my favorite element of the space: the vertical succulent gardens that climb the interior and exterior walls.


As much as I'd love to plant a vertical garden to camouflage the awful grey cinder block walls that surround my current rental, it's a rental. So, in the meantime ,maybe I'll hang a giant oil painting of a splendid cat in my bathroom, just like at The Smog Shoppe. 


Or not.

First and fourth images found  here and here. All other images courtesy my outdated iPhone.

Thursday, October 20, 2011

Saturday, October 15, 2011

Mornings With the Old Girl


Saturday morning, 6 a.m. Her wet nose nudges my shoulder. Groggy with sleep, it takes me a moment to orient myself. My blurry eyes scan the room: ceiling, wall, morning light streaming through the window. Bedside table, lamp, a nose in my face. Floppy ears. Those soulful, imploring eyes.

I rise from my bed in a swift motion -- my least favorite activity of the day -- and wrestle a white t-shirt over my head.

She beckons me to follow her downstairs, let her out, fill her bowl with kibble. Her hips are cranky, her hind legs stiff with age. Her back paws drag ever so slightly on the carpet, making a scuffing sound like an old lady shuffling around in rubber soled slippers. She looks back to make sure I'm following her lead. Hurry up, mama.

In the kitchen, she dances with excitement as I scoop kibble from the bin and dump it in her bowl. Clink, clink, clink. The kibble bounces against the porcelain. Up on her hind legs, she jumps like a kangaroo, her advanced age temporarily forgotten. Defied.

I pop her daily medications into little pill pockets, brown and squishy and bacon scented. Drool pours from her mouth in anticipation of her morning treats. Boing, boing, boing. Again, she dances.

The kitchen floor is cold under my bare feet and I shiver. I put the kettle on and take a mug from the cupboard. Tea.

She shadows me as I go to work making breakfast in the tiny kitchen. 

"Excuse me," I say brightly, and she moves aside so that I can reach into the cabinet for the skillet. "Excuse me," I say again in a singsong voice, and she moves from in front of the refrigerator so I can get the eggs, butter, berries.

"Pardon me." She moves again and again as I move around the kitchen, all four steps of it.

She settles at my feet in front of the stove. Crack, plop, whisk, pour. I stir and swirl the eggs ever so gently over the flame. The toast pops up from the toaster and I slide the skillet to a rear burner on the stove. Scrape, scrape, scrape. Butter, knife, bread.

I slice berries into a bowl, portion the eggs onto a plate and crumble sea salt flakes between my fingers and onto the eggs. The sound reminds me of the noise at the beginning of a record, after the needle drops.

Elbows on the counter, I tuck in to the eggs and sip my tea. The old girl is at my feet, alert for any morsels that might come her way.

I move to the sink behind me (turn, step) and wash my plate. Warm mug in my hands, I take my tea to the sofa where the old girl hops up onto her blanket. She settles next to me, groaning with relief as she sinks into the cushions.

Feet up on the coffee table, mug in one hand, I scratch and pet her muzzle with the other, my fingers tracing her cheeks where teeth have been extracted. The recesses make her face look older, wan.

I twirl her ears in my hand and run my fingers through her fur, now more taupe than grey. It is soft and worn like a wool rug after years of foot traffic.

As has so often been the case this year, when I look into her eyes I see my mother in her distant gaze. And, as usual, the tears come easily and my heart catches in my chest.

These mornings are a lingering goodbye, a meditation on impermanence. Time is measured and fleeting. And yet. These mornings, time seems to slow a little.

Thursday, June 30, 2011

Gluten-Free, Vegan Melktert (Milk Tart)

Remember how I told you I'd share the results of my first attempt at making a gluten-free, vegan version of our beloved melktert, provided it wasn't a disaster?

Well, it wasn't a disaster! It needs some further refinement, but it's not bad.


Actually, the more I think about it, the more pleased I am with the results. It's one thing to adapt a recipe to be gluten-free or vegan, and another thing entirely to tackle both at the same time. My two biggest fears -- that the custard wouldn't set and the crust would shatter and crumble -- didn't happen. A small victory in my gluten- (and mostly dairy-) free baking journey.

The crust -- made with King Arthur All-Purpose Gluten-Free Flour, Earth Balance Buttery Sticks, and a bit of sugar -- held together, but it's fragile for sure. The brown rice in the flour contributed a nice crunch, but there was a slight bitter aftertaste. There's no bean flour in the King Arthur blend, so I think the odd flavor might be from the Earth Balance. Earth Balance is also quite watery, so next time I'll use vegetable shortening.

As for the custard filling, to be honest it tastes more like coconut tapioca pudding than a milky cinnamon custard, but it's a start. I happen to love coconut tapioca pudding -- and spooned some of the filling, still warm from the saucepan, into a small bowl to enjoy with a sprinkle of cinnamon -- but the tapioca probably isn't necessary. I added it at the last minute out of fear that the custard wouldn't set without eggs (which you certainly don't have to omit if you're avoiding dairy but aren't vegan).

Lest I ramble on any more than I already have, my recipe and notes are after the photo...

Gluten-Free, Vegan Melktert (Milk Tart)
Serves 8

Unlike traditional melktert made with egg, in this version the custard isn't baked after being poured into the pre-baked crust.

For the crust:
1 1/4 cups gluten-free flour (I used a packaged blend as noted above, but plan to experiment with my own blends. I think teff and almond flours would contribute to a nice crust, and ground flax would help hold the dough together.)
1/2 cup vegetable shortening or 1 stick Earth Balance Buttery Sticks
2 tablespoons granulated sugar
1/4 teaspoon salt
Ice water (If needed; Earth Balance is so moist, I didn't need to add water.)
Additional gluten-free flour for rolling the dough
Vegetable cooking spray

1. In the bowl of a food processor (or in a medium bowl using a pastry cutter), combine the flour, shortening or Earth Balance, sugar and salt. Pulse until the mixture comes together in large clumps and holds together when you press it between your fingers. Add ice water, a tablespoon at a time, if needed.

2. Turn the dough out onto a sheet of plastic wrap or lightly greased parchment paper, cover with another sheet of plastic wrap or paper, and press it together to form a disc. Refrigerate, tightly wrapped, for at least an hour.

3. Heat oven to 400 degrees F. Unwrap the dough and place it on a floured work surface. Roll it out into a circle to fit an 8- or 9-inch pie or tart pan, dusting the rolling pin and dough with additional flour as needed. Transfer the dough to the pie or tart pan and press it evenly into the bottom, edges and sides. (My dough tended to crack and split at the edges and when I rolled it and when I transferred it to the tart pan, but you can press the pieces back together much more easily than when working with dough containing gluten.)

4. Bake the tart shell until golden brown, about 20 minutes, turning it as needed to ensure even browning if your oven has hot spots like mine. (You won't need to use pie weights, nor prick the dough with a fork to prevent it from bubbling up. It also doesn't shrink like many doughs that contain gluten.)

5. When done, remove the tart shell from the oven to a rack to cool while you make the custard filling.

For the custard:
3 cups coconut milk (I used "full fat," not lite, coconut milk, figuring the fat would make the custard more creamy and thick.)
3 sticks cinnamon, broken into pieces
1 whole nutmeg
1/3 cup plus 1 tablespoon cornstarch
1/2 cup granulated sugar
1/4 teaspoon salt
1/4 cup granulated tapioca (optional)
1 tablespoon vanilla bean paste or extract
Ground cinnamon for sprinkling over finished tart

1. In a heavy bottomed medium saucepan set over medium heat, bring 2 1/2 cups of the coconut milk, the cinnamon sticks and nutmeg almost to a boil. Remove from heat to cool for about 10-15 minutes.

2. Meanwhile, whisk the cornstarch, sugar, salt and tapioca (if using) in a medium bowl. Add the remaining 1/2 cup coconut milk and whisk or stir until thoroughly combined. Set aside.

3. Remove the cinnamon sticks and nutmeg from the warmed coconut milk, set the saucepan over medium low heat, and slowly whisk in the cornstarch mixture. Cook, stirring constantly (and scraping the sides, corners and bottom of saucepan to prevent clumping), until the mixture is thickened, about 10-15 minutes. Remove from heat, stir in the vanilla, and set aside to cool for about 30 minutes, until warm (you can speed this process by transferring the custard to a clean bowl and stirring it at regular intervals).

Assembly:
Pour the warm custard into the prepared tart shell, sprinkle with ground cinnamon to taste, and refrigerate, uncovered, until set. Slice carefully and serve.

Wednesday, June 29, 2011

Melktert (South African Milk Tart)

I miss South Africa -- and my in-laws -- like crazy. So it didn't take much for my husband to persuade me to make a melktert on Sunday.

Melkwhaaaat? Melktert. Milk tart if you insist on English. Sheesh.

Few foods are more traditionally South African than melktert, a custard pie brought by the Dutch settlers. What differentiates melktert from European and American custard pies is the higher ratio of milk to egg -- milk which is infused with cinnamon and, occasionally, tangerine peel, almond and/or nutmeg. There are many variations, and everyone's ouma (grandmother) has "the best" (secret!) recipe, but the crust is typically puff or short pastry and the filling is often lightened with egg whites.


I've used several different recipes for melktert and this one from Epicurious is my favorite. With a few adaptations, of course:

- Infuse the milk with 3 cinnamon sticks, broken into pieces, and two whole nutmeg
- Substitute cornstarch for wheat flour (i.e., omit flour and use 1/3 cup plus 1 tablespoon cornstarch)
- Increase sugar to 1/2 cup plus 2 tablespoons
- Substitute vanilla bean paste for vanilla extract
- Reduce baking time for assembled tart to 30 minutes (10 minutes at 400 degrees F, then 20 minutes at 350)
- Sprinkle tart with cinnamon sugar before baking, as well as cinnamon before serving

The finished tart is light and barely sweet, the ideal companion to afternoon or evening tea, all of which makes me dream of sitting around the table with my in-laws in South Africa. {sigh}

And last night? Well, last night I made a gluten-free, vegan version that's been chilling overnight. I'll share the recipe if it's not a total disaster when I slice into it this evening...

Thursday, June 02, 2011

Warm Broccolini Salad


Now that you've got some roasted baby tomatoes and mint gremolata on hand, I suggest you toss them with warm broccolini, crumble some feta on top and dig in. It's an ideal dish for practicing the USDA's new food icon, MyPlate, which I love because it makes me think our country is getting serious about mindful, responsible eating.

And in case the USDA doesn't convince you to eat more vegetables, head over to the New York Times and read Mark Bittman's argument for a plant-based diet augmented with limited quantities of wild fish and sustainably, ethically and locally produced meat, dairy and eggs.

Amen.

Warm Broccolini Salad
Serves 4-6
This dish reminds me of the vegetarian antipasto (green beans and broccoli marinated in olive oil and lemon) at Tommaso's in San Francisco's North Beach. A favorite dinner spot during frequent family visits to the Bay Area, Tommaso's wood-fired pizza oven is renowned but I think their vegetables deserve equal acclaim.

1 lb. broccolini, rinsed and ends trimmed
2 tablespoons mint gremolata
1 tablespoon crumbled feta
Salt and freshly ground black pepper to taste

1. Steam the broccolini until crisp-tender (about 5 minutes). Transfer to a collander and rinse briefly under cold water to halt the cooking process and preserve the bright green color. Roughly chop the warm broccolini, place it in a large bowl, and add the gremolata and roasted tomatoes. Toss to combine. Serve with a sprinkling of feta, salt and pepper. Or cover and marinate in the refrigerator for up to 24 hours before serving.

Wednesday, June 01, 2011

Roasted Baby Tomatoes


For me, few foods -- save for blackberries and watermelon -- conjure summer (or childhood) like tomatoes. Although the growing season in California is nearly year round, I associate tomatoes' cheerful skin (and shape!) and sweet-tart flavor with summer months. And something about their salty/mineral fragrance reminds me of evening rain on sun-warmed soil.

Summer won't officially be here for a few more weeks, but I like knowing I can get a taste of it (almost) anytime. So I keep baskets of cherry and grape tomatoes on hand for snacking. I just pop them into my mouth -- no need to dress them up or fashion them into sauce or pie (though making tomato tarts is on my To Do list).

But let's say you do feel like doing something a little more glamorous with them, or perhaps the tomatoes in your area haven't yet reached their peak flavor. Roasting them in the oven with a little olive oil and salt is just the thing to jazz them up without making too fine a point of it.

They're a great topping for fish, pasta, bread and vegetables. But be careful. You just might find yourself plucking them from the baking sheet and popping them into your mouth.
Oh, and another thing: your house will smell like a tomato patch that's been warming in the sun all day and it's just begun to rain.

Or am I overselling it?

Roasted Baby Tomatoes
1 pint cherry and/or grape tomatoes, rinsed and dried
About 1 teaspoon extra virgin olive oil
About 1/4 teaspoon kosher or coarse sea salt

1. Heat oven to 400 degrees F and line a baking sheet with parchment paper. Mound the tomatoes in the center of the baking sheet, drizzle with olive oil and sprinkle with salt. Using your hands, toss the tomatoes with the oil and salt to coat evenly, and scatter the tomatoes on the baking sheet. Be sure not to crowd the tomatoes together, or they'll steam instead of roast.

2. Roast for about 20 minutes, or until the tomatoes begin to wilt and wrinkle. Using a spoon or spatula, gently stir and toss the tomatoes around on the baking sheet and return to the oven for another 20 minutes, or until the tomatoes have a slight char.

Friday, May 27, 2011

Grilled Butterflied Leg of Lamb with Mint Gremolata


Most weekends this spring, I've been butterflying legs of lamb, marinating them in a mixture of garlic, lemon and herbs, and grilling them for the week's dinners and lunches. Laird is happy with the arrangement because the lamb is tasty and he doesn't have to do any of the work. I'm happy because it's all very easy and, well, Laird's happy.

Did you read between the lines in the paragraph above?

That's right. I do the grilling in our family, not my husband.

He used to. When we were dating, he'd invite me over for grilled Cajun salmon or rib eye with mashed potatoes and vegetables. But as soon as he slipped a wedding ring on my finger, BAM!, he forgot how to grill (and cook, mostly). But I'm (mostly) not complaining. Before we were married I wasn't accustomed to cooking dinner every night, and never cooked on the grill. (I was scared to even light it. It's a gas grill, and igniting gas makes me nervous.) Besides, I considered grilling to be a decidedly male pursuit.

But I conquered my fear of gas explosions and quickly found my footing. And something surprising happened: I've grown as a cook. By stepping outside my comfort zone -- the stove top and oven -- I've expanded my repertoire of seasonings, techniques and cuts of meat.

Last weekend I even kept my cool -- and kept on grilling -- when The Headless Hound emerged from the bushes behind the grill with a mouse in her jaws. And although you won't find me shrieking or jumping onto a table when confronted with a rodent (I grew up on a mountain farm, after all), I'd be lying if I told you I wasn't shaken up by having to deal with a dog parading around not-quite-dead vermin.

Oh dear. This talk of mice is going to put you off, isn't it.

Anyway.

The point is, a year ago I never dreamed I'd butterfly and grill a leg of lamb. But that's exactly what I've been doing -- and loving -- these days. You should, too.

Or you could get your significant other to do it.

Either way, it's perfect for Memorial Day and every day.


Grilled Butterflied Leg of Lamb with Mint Gremolata
Makes about 8 1/2-lb. servings

This flavorful lamb is tender enough to be reheated for quick lunches and dinners throughout the week. Be sure to reserve some gremolata for serving; it also makes a fantastic dressing for vegetables and grains.

1 4-1/2 lb. boneless leg of lamb, butterflied (Your butcher or meat department should be able to do this for you. Obviously my idea of "butterfly" is to "cut into chunks.")
1/2 cup olive oil
1 tablespoon sea or kosher salt
1 teaspoon freshly cracked black pepper
Cloves from two heads of garlic, peeled (use less if desired)
Zest and juice of two lemons (Tip: zest the lemons before juicing.)
1 cup fresh parsley leaves
1/2 cup fresh mint leaves

1. Rinse the lamb and pat it dry. Trim excess fat to about 1/4 inch and score it (as pictured, above). Place the lamb in a large bowl or shallow dish and set aside.

2. Make the gremolata: place the olive oil, salt, pepper, garlic, lemon, parsley and mint in the bowl of a food processor or blender and process until a loose paste forms (the mixture will be like runny pesto). Reserve about 1/4 cup of the mixture for serving.

3. Pour the gremolata over the lamb, turning and rubbing the lamb pieces to coat. At this point, you can cover the lamb and let it marinate in the refrigerator for up to two days, or marinate it at room temperature for up to two hours. Either way, the lamb should be at or near room temperature when you grill it.

4. When you're ready to cook the lamb, heat your grill to medium. Remove the lamb from the marinade, scraping off excess marinade (it burns easily). Place the lamb on the grill, cover and cook for about 10-15 minutes or until nicely charred (the marinade will smoke and flame a bit as it cooks). Leave the lamb alone; moving and turning meat on the grill tends to make it stick, inhibits grill marks, and toughens it. Turn the lamb over and cook for about 10 minutes on the other side, or until nicely charred and a meat thermometer inserted into the center of the thickest part registers 145 degrees F for medium-rare. (The temperature will rise to 160 as it rests.)

5. Remove the lamb from the grill and set it on a plate or platter to rest for about 10 minutes. I like to place grilled meat on a wire rack set over a baking sheet (see photo, below) and rest it in a warm (150 to 200 degree F) oven. I like to maintain my hard-earned char and grill marks, and find that putting meat on a plate and tenting it with foil can result in it steaming and becoming soggy on the underside where it rests in its juices. Any juices that collect on the baking sheet can be drizzled over the meat when served.


6. Slice lamb across the grain and serve with reserved gremolata. It's also great with tzatziki. (Trader Joe's is divine if you're not up to making your own.)


For weekday lunches, Laird reheats the lamb slices and wraps them in warmed flatbread with sliced red onion, tzatziki and crumbled feta. Yum.

Tuesday, May 24, 2011

Showing Up

I'm glad my last post resonated with you. Isn't it validating and motivating to know that others struggle, too, and that ruts and disappointments don't have to equal defeat? Thank you so much for the encouragement. I need it. We all do.

For further inspiration, check out these recent posts by Megan Gordon (A Sweet Spoonful) and Penny De Los Santos (Appetite), who seem to know exactly what I (we) need to hear these days.

Visions of Greatness Or Something Like It  - Megan perfectly articulates the trick of balancing the monotony of commercial baking with the reward of connecting with people through hand crafted food -- something I struggled with when I was baking professionally. She shares some great insight from Ari Weinzweig's book, A Lapsed Anarchist's Approach To Building A Great Business (which I promptly ordered), putting it thusly: "Crafting a Vision of Greatness... differs greatly from a mission statement in that it's more specific and is really a full-scale picture of what things will look like when you've arrived at where you're going and things are working well... [It's] a statement of optimism in the future and you've got to have this... It also allows you to create your reality instead of just reacting to problems... Regardless of what business you're in or what personal goal you're pursuing at the moment, it takes a lot longer to make something great than most people think. So many of us put such high expectations on ourselves for things to fall into place in a short period of time... Some of it has to do with our fast-paced culture and increasingly short-attention spans, but some of it also has to do with limited knowledge on the importance of staying power in most creative pursuits. There's something to be said about just showing up."

What If You Are Good Enough - Penny argues that no matter how many times our pursuits are rejected, we are good enough. "Whatever it is you want to do, you can do it.  Whatever it is you want to be, you can be it. So go do it.

So I've been showing up. I've cooked, styled and photographed a few recipes in the past two days. A sneak peek is below; the images are straight from my camera and need a bit of processing, but I like them.

Grilled Butterflied Leg of Lamb, Lemon Mint Pesto, Slow Roasted Tomatoes

Broccolini, Lemon Mint Pesto, Slow Roasted Tomatoes, Feta


I'm going to keep showing up. Promise me you will, too, okay?

Monday, May 16, 2011

Fight Your Way Through

It's no secret I've been in a blog slump lately. Whenever I think about writing and photographing a new post, I'm discouraged by thoughts such as, That's a vain thing to blog, That's not an original enough idea or recipe, and You don't have the talent or expertise to style and photograph that. Another factor is time; I'm challenged to find and devote the hours required to conceive, cook, style, light, photograph and process (let alone write) a story. Plus sometimes blogging seems so... self-involved. Which is odd considering how much I enjoy and learn from other blogs.

When I really think about it, something else is behind my slump, something for which I didn't have words until I came across a quote today from my beloved Ira Glass, Tweeted by Adrianna from A Cozy Kitchen, via Terilyn Fisher's Fish Food blog. (Huh? Also, what was I just saying about others' blogs? Exactly.)

So, without further ado, I re-blog these encouraging words from my favorite hipster nerd crush, courtesy of some people who aren't in a slump like me.

Nobody tells this to people who are beginners, I wish someone told me. All of us who do creative work, we get into it because we have good taste. But there is this gap. For the first couple years you make stuff, it’s just not that good. It’s trying to be good, it has potential, but it’s not. But your taste, the thing that got you into the game, is still killer. And your taste is why your work disappoints you. A lot of people never get past this phase, they quit. Most people I know who do interesting, creative work went through years of this. We know our work doesn’t have this special thing that we want it to have. We all go through this. And if you are just starting out or you are still in this phase, you gotta know its normal and the most important thing you can do is do a lot of work. Put yourself on a deadline so that every week you will finish one story. It is only by going through a volume of work that you will close that gap, and your work will be as good as your ambitions. And I took longer to figure out how to do this than anyone I’ve ever met. It’s gonna take awhile. It’s normal to take awhile. You’ve just gotta fight your way through.
- Ira Glass

Ira's words are spot on and I am taking them to heart. It's only through practice that we -- that I -- will achieve growth and maybe, eventually, mastery.

Oh, and if you look to your right, at the list of blogs I follow, you'll get a glimpse of my killer taste and why my work disappoints me to the point of paralysis. But I'm gonna fight my way through... yes, I am.

Thursday, May 12, 2011

Video Tutorial: Homemade Bread

If you've ever been intimidated by the thought of making bread at home (yeast! the horror!), I put together this little video to demonstrate how easy it is.* Special thanks to Gemma, The Headless Hound and my husband (who really is that impatient when food is concerned) for their help. Enjoy!


*Okay, this video is by the amazing William Wegman and originally aired on Sesame Street. Thank you, Jake, for reminding me of this and all of Wegman's hilarious -- and instructional -- videos (the Hardly Boys is a long time favorite). We wish we could get Gemma and The Headless Hound to help out in the kitchen, especially in the mornings when we are in need of tea and toast. Gemma is more suited to, say, a tutorial about posing for chalk body outlines, don't you think?