Showing posts with label South Africa. Show all posts

Wednesday, February 09, 2011

The Old Biscuit Mill

One of my favorite things to do in Cape Town is visit the Saturday morning Design Goods and Neighbour Goods Markets at The Old Biscuit Mill. A former, uh,  biscuit (cookie) mill built in the late 1800s, the village-like complex now houses shops, galleries, farm stalls and cafes, as well as day and night markets, festivals and events. It's a must. (As is a visit to the Mill's website, which does a much better job than I of explaining it.)

The key to the Saturday markets is to arrive early. They officially open at 9 a.m., but it's best to get there as early as 8; the purveyors will still be setting up their stalls, but by 9:30 it's a mad house through which you can barely move, let alone get a decent photo -- or the pastry you've been coveting since you arrived.

And now I'm going to positively bomb this post* with photos because talk is cheap, a photo is worth a thousand words, and you're only here for the photos, right? 

*I know: I need to build galleries for photo heavy posts. Someday...

The Design Goods Market
Here you'll find designers selling clothing, accessories and toys for children, animals and the young at heart. My favorite stall is Petite Pois, where spunky children's clothes are sold out of a customized 1970s Mini. I couldn't resist getting a Rainbow Brite-ish outfit (top left corner of the photo below) for my friends Jake and Reagan's daughter, Piper. You can see Piper rocking the outfit -- and some other stuff I picked up for her -- here. (And, as Reagan would say, don't be jeal'!)


I really, really, really wanted one of these dolls, but I just couldn't justify it.


 Nor could I justify hauling this tipi back to America. (Sniffle.)


The Neighbour Goods Market
Words can't describe the awesomeness of the food and drink you'll find under the two giant tents at the Neighbour Goods Market. I've been stuck for hours trying to write something to do it justice, so I'll just tell you to bring your appetite and a big bag for hauling your goods home -- if they make it that far.

Something you don't need to bring, however, is a lot of cash. I'm making a huge generalization here, but compared to America, quality food is more affordable in South Africa, and not just because of the favorable exchange rate. Similar to what I observed in Europe, in South Africa fresh, local, organic, expertly crafted food isn't the luxury it is here.

Communal tables made from old doors.
I fell in love with the funky old striped refrigerator in the background on the left.


Bread, glorious bread.

A hummus platter bigger than my head.

The biggest spring rolls I've ever seen (about 3x5 inches each).

Veggie struuuuuuuudel.

Whipping up fresh Hollandaise for rosti Benedict.


With an exchange rate of about 7 South African rand to one U.S. dollar, these pies are about $3.50.
Veggie curry wraps.

Mushroom skewers at the Funky Fungi stall.
I loved the Bay Kebab stall because my maiden name is from the Dutch word, schoner.
The Bay Kebab truck. Brilliant.


$3!

Beer at 9 a.m.?
I prefer coffee.

Savory tarts.

Sweet tarts.

Apple galettes.

Giant apple strudel (about $2.50).


Carrot cake muffins with lime icing at Tina Bester's Queen of Tarts stall.

Lemon meringue tartlets at Queen of Tarts.

Milk tart (melktert). Very South African, very delicious.
"Really brilliant biscuits" at Dunk.


Artistry at Martin Senekal Confectionery Design. The sweet potato peanut cake was mind blowing.

Well, friends, that's about all the photos this little blog can handle. Thanks for scrolling -- I hope it didn't give you a finger cramp.

Saturday, August 28, 2010

Lamb Chops with Pomegranate Molasses

To further demonstrate that I don't only make and eat sweets, I hereby present my easy go-to dish for when we want comfort food, which is most of the time: lamb chops, roasted baby potatoes and broccolini.


Lamb is ubiquitous in South Africa -- the arid Karoo region produces arguably the most mild-flavored lamb in the world and you can buy it at gas stations (no joke) -- but I've never much cared for it and my husband isn't a fan of the pungent stuff here in the States. So I have a trick, if you will, for mellowing the flavor: pomegranate molasses. It's not easy to find, but is well worth a trip to a specialty market or the Internet. (I buy Sadaf brand from chefshop.com, which has but one ingredient: California pomegranates.)

Pomegranate molasses is brilliant because you can use it in a variety of sweet and savory dishes. Much like balsamic reduction -- but better -- it's a great component in salad dressings and sauces and is equally delicious simply drizzled over ice cream or strawberries.

And drizzling is exactly how I use it to flavor lamb chops.  Season your chops with salt and pepper, grill for about 5 minutes on each side (for medium), remove to a platter, and generously drizzle with pomegranate molasses. Booyah. Delicious.


To make the potatoes, simply toss them with olive oil, sea salt and black pepper, arrange them on a baking sheet and bake at 400 degrees F for about 35 minutes. After 20 minutes I move the potatoes around so they get brown and crispy on both sides.


Monday, July 12, 2010

World Cup Lunch: Bison Steak and Mushroom Pies


Today I made a big batch of Bison Steak and Mushroom Pies for my husband, who has been asking me to make Steak and Kidney Pies ever since we returned from South Africa in April. Since today was the World Cup final and closing ceremonies, and we were missing our family in South Africa terribly, I figured the pies would make a fitting lunch.
This was my maiden voyage into Steak and Kidney Pie territory, so I consulted my go-to cookbook for all things English: Nigella Lawson's How To Be A Domestic Goddess: Baking and the Art of Comfort Cooking. The filling from her Steak and Kidney Pudding recipe fit the bill, with some modifications -- most notably, substituting bison steaks for beef chuck, and making hand pies instead of steamed puddings.

The recipe had to be further altered when I went to the market to buy the kidneys and found they were out. So I increased the quantities of steak and mushrooms to compensate.

Bison Steak and Mushroom Pies
Makes 12 small hand pies
Note: This recipe is not complicated, but it is a lengthy endeavor, as the filling must simmer for at least 1 1/2 hours. I made my filling the day before assembling and baking the pies, which is recommended as it improves the flavors. The filling is insanely delicious, and would be good in a variety of dishes or as a stew on its own.

For the filling:
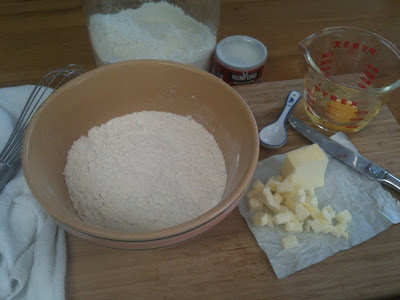
3 tablespoons all-purpose wheat or gluten-free flour
1/2 teaspoon English dry mustard (e.g., Coleman's)
Salt & freshly-ground pepper
24 ounces bison steak (such as filets mignons), cut into 1/2 inch pieces (or meat of your choice, such as beef chuck, lamb, etc.)
4 tablespoons olive oil, divided
1 medium onion, diced
8 ounces crimini (baby portobello) mushrooms, halved (or quartered, if large)
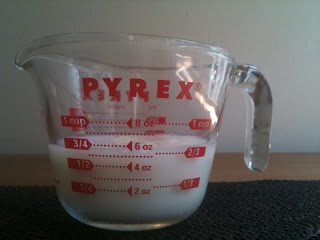
1/2 cup plus 2 tablespoons beef stock
1/2 cup plus 2 tablespoons stout or dark ale (such as Guinness)
2 teaspoons natural oyster sauce
1 teaspoon corn starch dissolved in 1 tablespoon water (if needed to thicken the filling)
For the pastry:
4 sheets puff pastry or 1 recipe of your favorite pie dough (enough for a large double-crust pie)
For the egg wash (optional):
1 egg whisked with 1 tablespoon milk or water


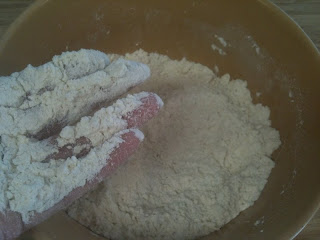
1. Preheat oven to 250 degrees F. Combine the flour, mustard, salt and pepper (to taste) in a gallon Ziploc bag. Add the steak and shake to coat with flour.


2. In a dutch oven or heavy, lidded pot set over medium heat, warm 2 tablespoons olive oil. Brown the steak in batches, removing each to a paper towel-lined plate to drain. Be sure to scrape the floury bits from the bottom of the pan and add more oil as needed. Set aside.


3. Saute the onion in the pan until it starts to turn translucent, adding more oil if needed. Add the mushrooms and saute until they begin to soften.


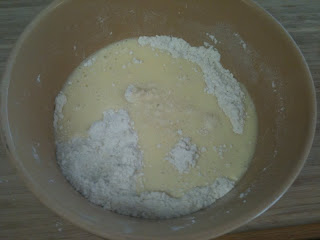
4. Return the meat to the pan with the onions and mushrooms, and add the beef stock, stout and oyster sauce. Bring to a boil, scraping any browned bits from the bottom. Cover and transfer to the preheated oven to cook for about 1 1/2 hours, stirring occasionally.


Note: My filling was still quite watery after 1 1/2 hours, so I removed the lid, increased the oven temp to 350 degrees, and cooked the filling for another 1/2 hour. If the filling needs to be thickened further yet, transfer the pan to the stove top, slowly stir in the cornstarch mixture while bringing to a boil, and stir until thickened. Set aside to cool. At this point, you may refrigerate or freeze all or half the filling for later use.


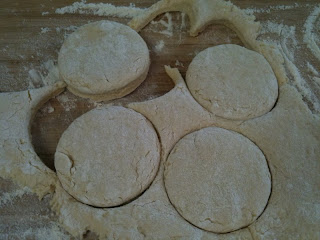
5. Heat oven to 425 degrees F. On a well-floured surface, roll out the puff pastry or pie dough to an approximately 10x10-inch square, then cut into quarters. Spoon about 3 tablespoons of the filling into the center of each square, then fold in half diagonally as if making a turnover. Press the dough together around the filling, trimming to a half-circle and crimping the edges with a flour-dipped fork to seal. Transfer each pie to a parchment-lined baking sheet and refrigerate so as to prevent the dough from becoming gooey. (Depending on your number of baking sheets and the size of your oven, you may have to assemble and bake the pies in batches. I ended up with four pies on each of my four baking sheets, which I then baked two at a time.)


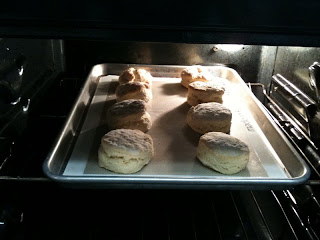
6. If desired, brush each pie with the egg wash. Bake at 425 degrees for about 15 minutes, or until lightly browned, then reduce heat to 400 degrees, rotate the pans top to bottom and front to back, and cook for about another 15 minutes or until well-browned and bubbling. Serve immediately or cool completely, wrap tightly, and refrigerate or freeze for later.

Monday, June 21, 2010

One Love, Two (Batches Of) Scones


Growing up, one of my family's many food traditions was reggae and scones on Sundays. My dad would spin records on the living room turntable while my mom turned out rustic, currant-studded scones from our tiniest of kitchens.

Though my dad is no longer with us, for Father's Day yesterday I honored him (and our family's tradition) by firing up some reggae and scones. Twice.

I put a new twist on tradition by using my husband's grandmother's (Nana's) recipe for South African scones. While my mom's scones were triangular, flaky and slightly sweet, South African scones are unsweetened, round, and more like biscuits from the American South. They're really just a vehicle for jam (typically apricot or strawberry) and unsweetened, freshly-whipped cream.

Some other distinctions worth mentioning:

1. In South Africa, "scone" is pronounced "sk-ON," not "sk-OHHH-n" When I was first dating my husband, I tried to impress him by making sk-OHHH-nz. Not only was I making them in the American style and adding currants (oh, the horror!), I was mispronouncing the very word.

2. As is the rule when making biscuits, the key to success with Nana's scones is to use a very light touch. Overworking the dough will result in a hockey pucks, not scones.

3. Speaking of hockey pucks: always make certain your baking powder is fresh. Read on to see why.

Nana's Scones
Makes 6 (2 3/4-inch) scones
2 cups unbleached all-purpose flour (recommended: King Arthur Organic)
3 teaspoons baking powder (aluminum-free or homemade)
1/4 teaspoon salt
2 tablespoons unsalted butter, cold, cut into 1/4 inch pieces
1/2 cup milk (traditionally whole, but I use 2% with good results)
1 large egg
water

1. Heat oven to 450 degrees F and line a baking sheet with a silicone baking mat or parchment. (I usually use both, and highly recommend the use of silicone baking mats for their insulating and heat-distribution properties. I also swear by commercial-grade aluminum jelly roll pans.)

2. In a medium bowl, whisk together the flour, baking powder and salt. Quickly rub the butter into the flour mixture with your fingertips until the mixture is a bit more coarse than coarse cornmeal. You want some pea-sized lumps to remain.


3. Measure 1/2 cup milk in a liquid measuring cup. Add the egg and whisk to combine. You need 3/4 cup of liquid, so, if needed, whisk a bit of water into the milk-egg mixture until you have 3/4 cup total.


4. Add the milk mixture to the flour mixture and gently stir with a fork until it the dough forms a ball. Turn out onto a well-floured surface and sprinkle evenly with flour. Flour your hands and gently pat the dough into a round, making a couple gentle passes with a floured rolling pin until the round is about 3/4-inch thick.


5. Stamp scones from the dough using a 2-3/4-inch round biscuit cutter, gently gathering the scraps and re-shaping the dough one or two more times until you've used all of it. (Do not overwork this dough!) Be sure to employ a biscuit-cutting technique, pressing the biscuit-cutter straight down into the dough without turning or wiggling it, then gently pulling the dough away from the rounds you've cut.


6. Place the rounds on the prepared baking sheet and bake on the center oven rack for 8-12 minutes, checking the scones for even browning (and rotating the baking sheet back-to-front if needed) after 6 minutes.


Ahem. Except my scones didn't rise and I ended up making them all over again.

It all went wrong with an innocent little tin of baking powder.

The Culprit

You see, baking powder and baking soda have limited shelf lives -- generally about 6 months when stored in a cool, dry place. After which, they lose their ability to make things rise.

I know this.

But when I began making my Father's Day scones, I spaced on the fact that I was out of baking powder, thanks to the previous week's baking frenzy. No biggie, I thought, I'll just make homemade baking powder from cream of tartar and baking soda. Nope. I was out of cream of tartar, too. But I did find a little tin of baking powder when I was rooting around in the cupboard for leavening agents. I was so happy with my discovery, I didn't even bother to check the expiration date. I just whisked the baking powder into my flour and proceeded onward.

Turns out the baking powder was two years old. And old baking powder = hockey pucks.


Hockey Puck

So I went to the market, bought a fresh tin of baking powder (and some cream of tartar), and started over. The upside is, my dad's memory was honored not once, but twice also.

Scone

Wednesday, June 09, 2010

Kickass Chicken Pies

When my husband and I were in his home town, Cape Town, in March, we met an old friend of his for an afternoon snack at Jardine Bakery, the walk-up takeaway counter at the side of Jardine restaurant. The boys sampled a few sandwiches, and I went for a "Kickass Pie": a stunning muffin-sized (and shaped) chicken and mushroom hand pie.

Hand pies are ubiquitous in Cape Town, and I sampled as many as I could reasonably get away with while we were there. But Jardine's were a clear standout. The buttery, flaky crust gave way to chunks of mushroom and chicken in a tangy, creamy sauce that tasted of creme fraiche, lemon, thyme and nutmeg.

I forgot to take a photo, but the image at left (from Google Images) approximates Jardine's Kickass Pies.

I've always made individual chicken pot pies for my husband. Stored in the freezer, they can be popped into the microwave for a quick lunch or a savory bite with afternoon tea. So when we returned from Cape Town, I set out to recreate those Kickass Pies from Jardine.

However, in an effort to cut down on the fat and empty calories in my pies, I decided to make single-crust pot pies in 12-oz ramekins (the perfect size for my 6' 5" husband). You, of course, could make smaller pies in, say, 8-oz ramekins. And you could make these gluten- and/or dairy-free by making the appropriate substitutions.

Kickass Chicken Pies
Makes 6 pies if using 12-ounce ramekins

Ingredients
4 6-oz boneless, skinless free-range chicken breasts
salt & pepper
2 tbsp extra-virgin olive oil
2 leeks, chopped
1 lb button and/or crimini mushrooms, sliced
2 tbsp unbleached all-purpose flour
1 cup low-sodium free-range chicken broth or stock
1 1/2 tbsp fresh thyme, finely chopped
3 ounces creme fraiche
1/2 tsp lemon zest
1 tsp lemon juice
1/4 tsp freshly grated nutmeg
pie crust*

*If using store-bought pie crust, you will need about 1 1/2 9-inch rounds. (For my most recent batch of pies, I used Wholly Wholesome Organic Whole Wheat frozen pie shells from Whole Foods, which I thawed, then cut and cobbled together.) If using homemade, you'll need enough for 1 1/2 single-crust pies.

1. Preheat oven to 375 degrees and line a half-sheet jelly roll pan with aluminum foil.

2. Generously season the chicken breasts on both sides with salt and pepper. Roast for 30 minutes (or until internal temp of thickest part of breast registers 160 degrees/they are cooked through/juices run clear), turning over after the first 20 minutes. Set aside to cool. Once cooled, chop or shred into bite-sized pieces.

3. Meanwhile, in a large saute pan over medium heat, saute the leeks in the olive oil (seasoning with a bit of salt and pepper) until they begin to soften. Add the mushrooms and saute until they are also mostly cooked and have released their liquids.

4. Add the flour to the middle of the saute pan and cook, stirring, for a minute or two. Add the chicken broth and simmer, stirring, until the mixture begins to thicken.

5. Add the creme fraiche, thyme, lemon zest, lemon juice, nutmeg and chopped/shredded chicken. Cook, stirring, until the mixture is well-combined. Season to taste with salt and pepper.

6. Set the chicken mixture aside to cool (if you assemble the pies while the chicken mixture is hot, the crust will get soggy).

7. Heat the oven to 400 degrees or to the temperature specified on the pie crust package (or your pie crust recipe). Cut the pie crust to about 1/2 to 1 inch larger than the size and shape of your ramekins. Spoon the cooled chicken mixture evenly into the ramekins and cover with the pie crust, either draping it over the sides or tucking and crimping it against the insides of the ramekins. Poke holes (or cut a small hole in the middle) in each crust to vent. If desired, brush the crust with an egg wash.

8. Bake for about 30-40 minutes, or until the crust is golden brown and flaky and the filling is bubbling. Serve immediately or, to freeze for later, cool the pies completely, wrap them tightly in plastic wrap and aluminum foil, and freeze.