Showing posts with label baking blunders. Show all posts

Friday, September 03, 2010

Chocolate-Malt Cake Challenge, Phase Two: A Turn for the Worse

The Momofuku Chocolate-Malt Cake Challenge has taken a turn for the worse. Last night was Phase Two: Cake Layers. Everything was smooth sailing until the batter went into the oven. Then this happened:


Here's the deal: I thought the cakes might sink. The recipe doesn't specify whether one should use non-alkalized (natural) or alkalized (Dutch-process) cocoa. Judging from the burnt sienna hue of the cake layers pictured in Bon Appetit, I suspected it was alkalized. The leavening agent (baking powder) in the recipe would also suggest this, but the acid (buttermilk) sort-of contradicts it. The point is, I thought the leavening would be off and it was. Were I to make this again -- and I probably will -- I would use non-alkalized cocoa and add baking soda.

The recipe -- which I'll be updating upon further testing -- is interesting in that it calls for butter and vegetable oil; sugar and corn syrup; melted chocolate and cocoa.

Chocolate-Malt Cake
Recipe: Christina Tosi via Bon Appetit
Makes three 8-inch layers

Nonstick vegetable oil spray
2 ounces bittersweet chocolate (70% to 72% cacao), chopped [I used Valrhona 70%.]
1 3/4 cups all purpose flour
3/4 cup unsweetened cocoa powder [I used Valrhona, which is alkalized.]
2 teaspoons baking powder
1 teaspoon coarse kosher salt
3/4 cup (1 1/2 sticks) unsalted butter, room temperature
2 1/4 cups sugar
3 tablespoons light corn syrup
3 large eggs
3/4 cup buttermilk
1/3 cup vegetable oil
1 teaspoon vanilla extract

1. Heat oven to 350 degrees F. Coat three 8-inch cake pans with nonstick spray. Line bottom of each pan with parchment round; coat parchment with nonstick spray.

2. Place chocolate in small microwave-safe bowl. Melt in microwave in 15-second intervals just until melted, stirring occasionally. Set aside.

3. Sift flour, cocoa powder, baking powder, and coarse salt into medium bowl.

4. Combine butter, sugar, and corn syrup in large bowl of stand mixer fitted with paddle attachment.; beat on medium-high speed until fluffy and pale, about 2 minutes. Scrape down sides of bowl. Add eggs, one at a time; beat on low speed to incorporate, then increase speed to medium-high and beat until mixture is fluffy, about 2 minutes. Scrape down sides of bowl.

5. Add melted chocolate. Beat until blended, about 1 minute. Add buttermilk, oil, and vanilla; beat on medium-high speed until pale brown, about 2 minutes. Add dry ingredients; beat on low speed just until blended, about 45 seconds. Divide batter among pans; smooth tops.

6. Bake cakes until tester inserted into center comes out clean, about 20 minutes. Cool completely in pans on racks. [Note: My cakes baked for a full 35 minutes.]

Writing these Chocolate-Malt Cake posts makes me want to go searching for chocolate. How about you?

Monday, June 21, 2010

One Love, Two (Batches Of) Scones


Growing up, one of my family's many food traditions was reggae and scones on Sundays. My dad would spin records on the living room turntable while my mom turned out rustic, currant-studded scones from our tiniest of kitchens.

Though my dad is no longer with us, for Father's Day yesterday I honored him (and our family's tradition) by firing up some reggae and scones. Twice.

I put a new twist on tradition by using my husband's grandmother's (Nana's) recipe for South African scones. While my mom's scones were triangular, flaky and slightly sweet, South African scones are unsweetened, round, and more like biscuits from the American South. They're really just a vehicle for jam (typically apricot or strawberry) and unsweetened, freshly-whipped cream.

Some other distinctions worth mentioning:

1. In South Africa, "scone" is pronounced "sk-ON," not "sk-OHHH-n" When I was first dating my husband, I tried to impress him by making sk-OHHH-nz. Not only was I making them in the American style and adding currants (oh, the horror!), I was mispronouncing the very word.

2. As is the rule when making biscuits, the key to success with Nana's scones is to use a very light touch. Overworking the dough will result in a hockey pucks, not scones.

3. Speaking of hockey pucks: always make certain your baking powder is fresh. Read on to see why.

Nana's Scones
Makes 6 (2 3/4-inch) scones
2 cups unbleached all-purpose flour (recommended: King Arthur Organic)
3 teaspoons baking powder (aluminum-free or homemade)
1/4 teaspoon salt
2 tablespoons unsalted butter, cold, cut into 1/4 inch pieces
1/2 cup milk (traditionally whole, but I use 2% with good results)
1 large egg
water

1. Heat oven to 450 degrees F and line a baking sheet with a silicone baking mat or parchment. (I usually use both, and highly recommend the use of silicone baking mats for their insulating and heat-distribution properties. I also swear by commercial-grade aluminum jelly roll pans.)

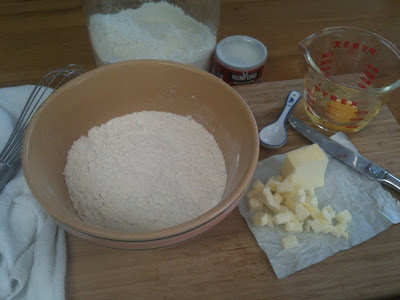
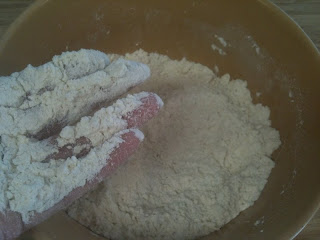
2. In a medium bowl, whisk together the flour, baking powder and salt. Quickly rub the butter into the flour mixture with your fingertips until the mixture is a bit more coarse than coarse cornmeal. You want some pea-sized lumps to remain.


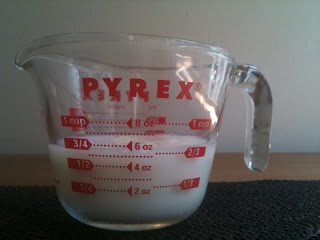
3. Measure 1/2 cup milk in a liquid measuring cup. Add the egg and whisk to combine. You need 3/4 cup of liquid, so, if needed, whisk a bit of water into the milk-egg mixture until you have 3/4 cup total.


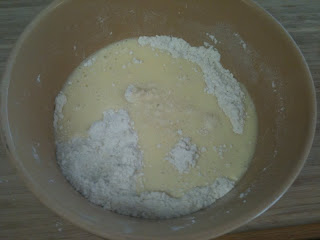
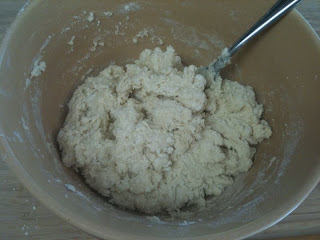
4. Add the milk mixture to the flour mixture and gently stir with a fork until it the dough forms a ball. Turn out onto a well-floured surface and sprinkle evenly with flour. Flour your hands and gently pat the dough into a round, making a couple gentle passes with a floured rolling pin until the round is about 3/4-inch thick.


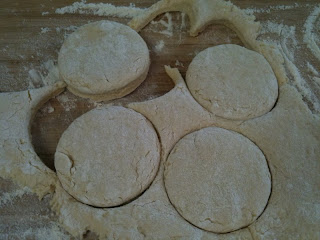
5. Stamp scones from the dough using a 2-3/4-inch round biscuit cutter, gently gathering the scraps and re-shaping the dough one or two more times until you've used all of it. (Do not overwork this dough!) Be sure to employ a biscuit-cutting technique, pressing the biscuit-cutter straight down into the dough without turning or wiggling it, then gently pulling the dough away from the rounds you've cut.


6. Place the rounds on the prepared baking sheet and bake on the center oven rack for 8-12 minutes, checking the scones for even browning (and rotating the baking sheet back-to-front if needed) after 6 minutes.


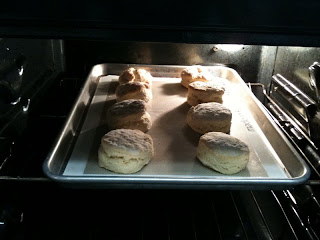
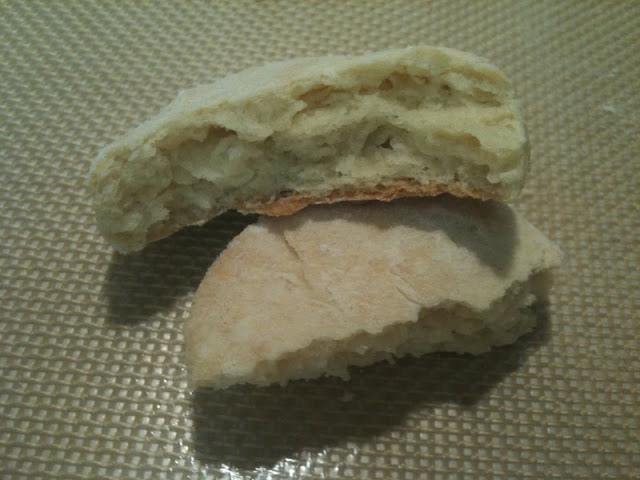
Ahem. Except my scones didn't rise and I ended up making them all over again.

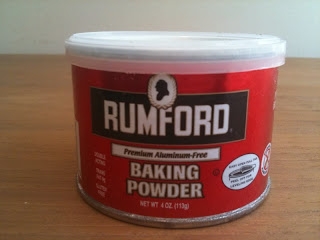
It all went wrong with an innocent little tin of baking powder.

The Culprit

You see, baking powder and baking soda have limited shelf lives -- generally about 6 months when stored in a cool, dry place. After which, they lose their ability to make things rise.

I know this.

But when I began making my Father's Day scones, I spaced on the fact that I was out of baking powder, thanks to the previous week's baking frenzy. No biggie, I thought, I'll just make homemade baking powder from cream of tartar and baking soda. Nope. I was out of cream of tartar, too. But I did find a little tin of baking powder when I was rooting around in the cupboard for leavening agents. I was so happy with my discovery, I didn't even bother to check the expiration date. I just whisked the baking powder into my flour and proceeded onward.

Turns out the baking powder was two years old. And old baking powder = hockey pucks.


Hockey Puck

So I went to the market, bought a fresh tin of baking powder (and some cream of tartar), and started over. The upside is, my dad's memory was honored not once, but twice also.

Scone